After sewing hundreds of face masks and spending months developing, testing, and tweaking my face mask patterns, we have developed what we think is the most comfortable, precisely designed fitted face mask pattern — and we have made our free Best Fitted Face Mask Pattern PDF in NINE sizes, four adult sizes and five child sizes.
We have received such great feedback on the comfort and fit of our fitted face mask sewing pattern and we are excited to finally have this free fitted face mask pattern and step by step tutorial ready for you.
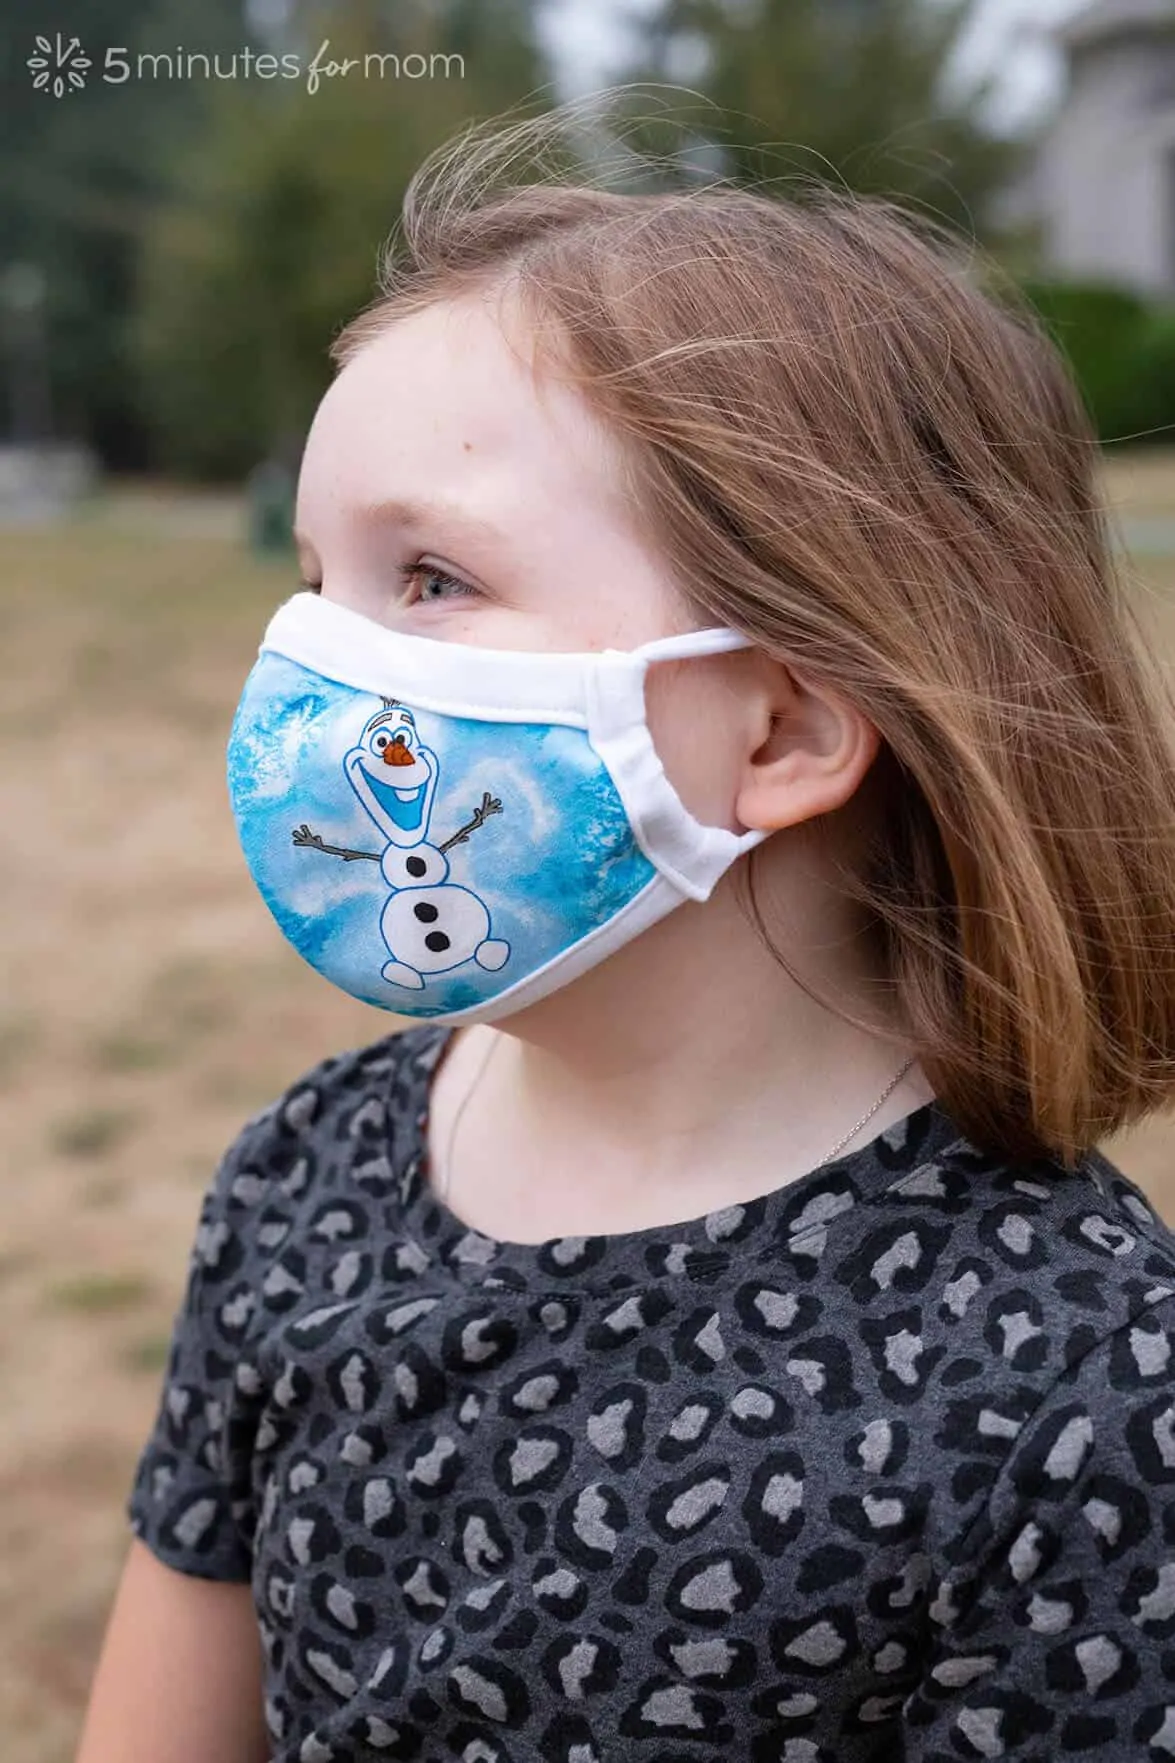
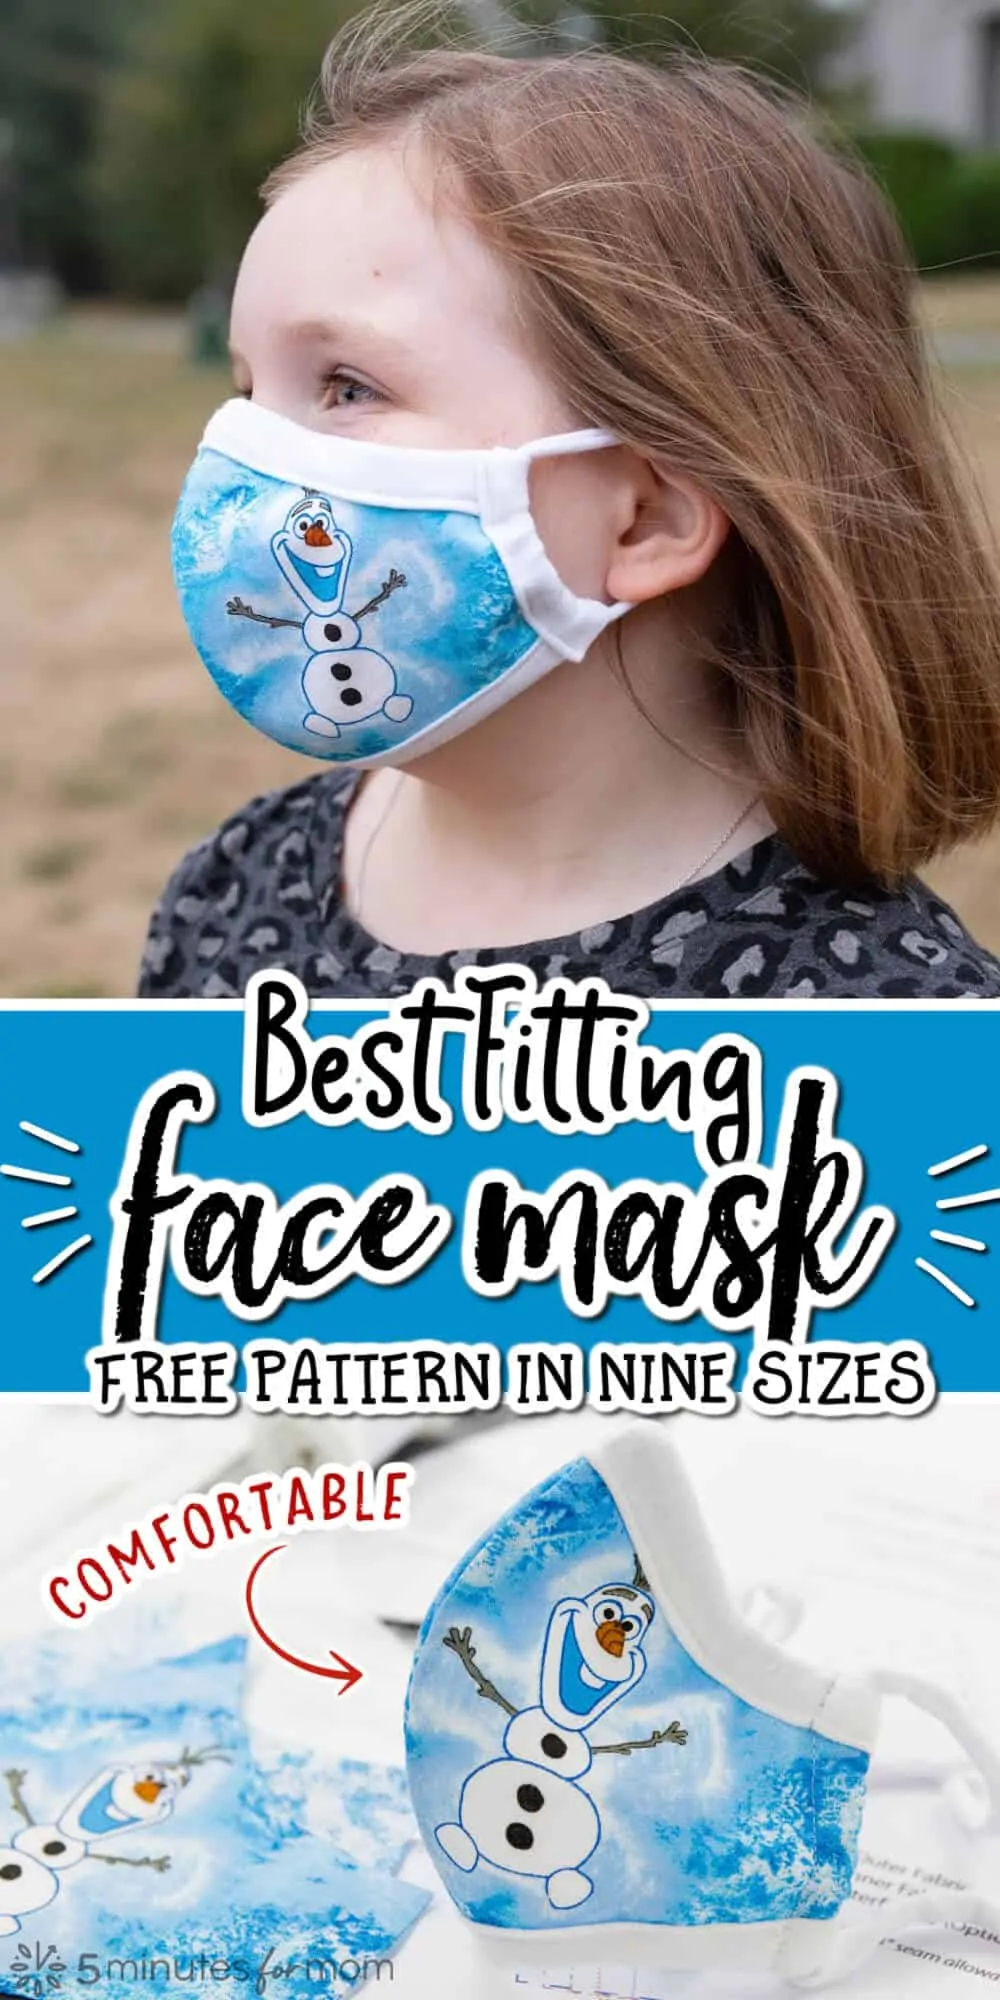
This fitted face mask has a snug fit with minimal gaps for air to escape or enter. It is so comfortable you could even call it cozy!
(If you don’t have a sewing machine, you could sew this by hand, or ask a friend who sews to make these face masks for you. They’ll likely be happy to have the pattern to make masks for themselves too. It’s a quick sewing project.)
Our free printable Best Fitted Face Mask Pattern features:
Make a Fitted Face Mask Fit Better with Stretchy Ties
Watch and see how to make stretchy knit ties for your face masks…
How well your mask fits your face and seals out airflow is critical for protection.
One of the main problems with the disposable surgical style masks is that they don’t seal around your face.
Clearly, N95 masks are ideal and it would be best if we all could wear N95 masks all the time. But many of us cannot afford (or get access to) enough N95 masks for everyone in our family to use every day.
So another option for increasing the protection of a cloth mask is to layer your cloth mask on top of a disposable surgical style mask.
The CDC recommends when facial hair such as beards make mask fitting difficult, that people can…
“Wear one disposable mask underneath a cloth mask that has multiple layers of fabric. The second mask should push the edges of the inner mask against the face and beard.”
This double masking strategy works well even when you don’t have a beard. I double mask like this when I go grocery shopping.
The fitted face mask over top of a disposable mask helps me feel a bit more protected.
Along with providing our free printable pattern in 9 different sizes, we have two design options with full free tutorials, so you can make your fitted face masks with or without the soft, stretchy knit binding around the edges of the mask.
This knit binding option is wonderful for all ages, but it is especially ideal for kids as it creates a comfy mask with stretchy edges that gather and fit perfectly around their faces, which helps to create a tighter seal with better protection.
You can download the tutorials as well as the patterns.
DOWNLOAD PATTERNS HERE:
DOWNLOAD INSTRUCTIONS HERE:
To read the instructions online, scroll down for the Fitted Face Mask with Knit Binding tutorial in this post or click over to view the How to Sew our Best Fitted Face Mask Pattern Tutorial Part 2, which includes the instructions for making our Fitted Face Mask without the knit binding trim.
There are several key elements to create a well-fitting face mask that has a snug fit, with no spaces for air to flow in/out along the edges of the mask.
In order to have the best fitting face mask possible, the mask must not have gaps along the side of the face, between the ties or elastic ear loops.
The key to fixing gaps at the side of the face mask is to have a casing or channel through which the ties or elastic thread. With the casing/channel, the ties can gather the fabric at the side of the mask instead of having it fold and gap.

For the mask to have a tight fit around the nose and cheeks it needs to have a nose piece that bends and fits over the bridge of the nose.
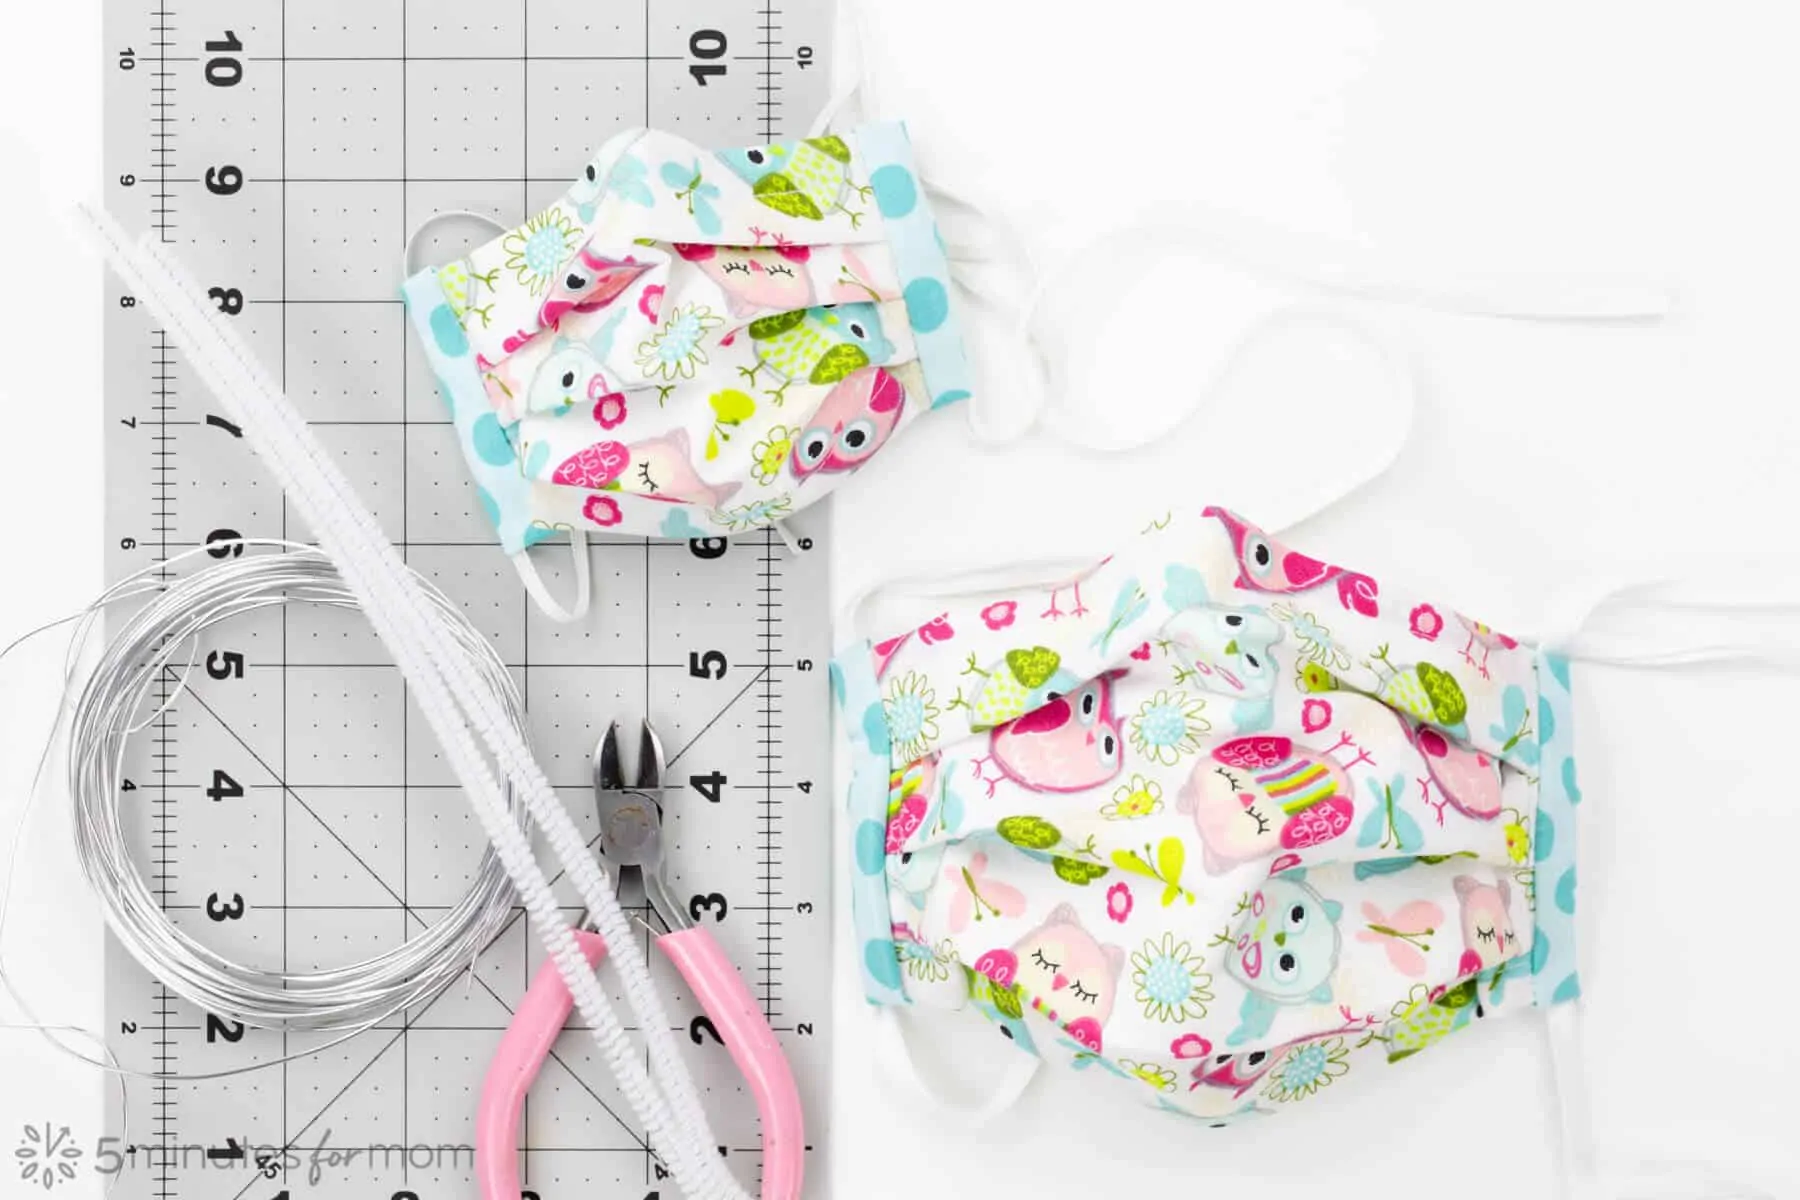
There are many DIY options for nose pieces, which we have covered in our previous face mask patterns, including pipe cleaners and various kinds of wire and metal.
However, now that we deep into this pandemic, Amazon has inexpensive aluminum face mask nose pieces readily available. You can buy a pack of 100 nose pieces for under $8. You can also use the nose pieces to improve the fit of disposable masks.
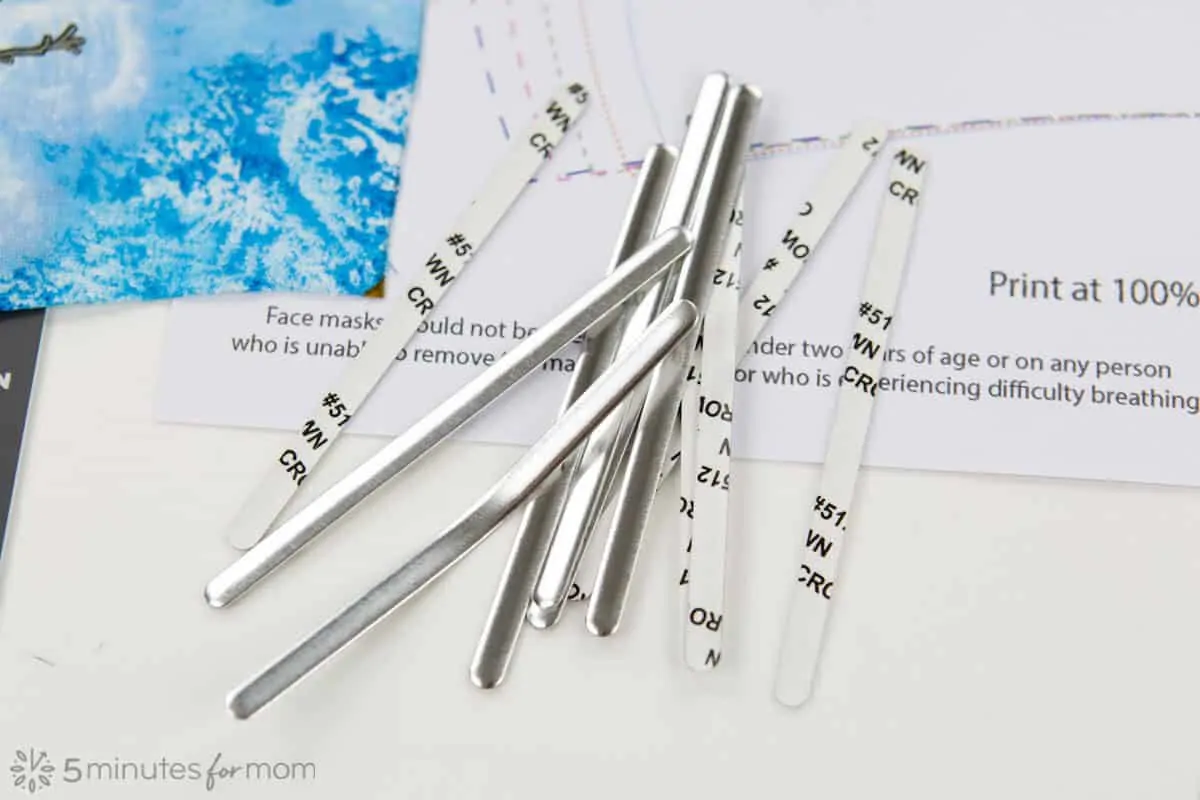
Since these nose pieces are flexible, to fit the shape of your nose, we recommend hand washing and air drying your masks in order to preserve their shape as long as possible.
UPDATE: Lately, I have started using two of the nose pieces together to make them stronger and more resistant to breaking. But eventually the nose piece may break. In that case, you can stitch rip the seam a little and replace the nose piece and sew it back up.
Here is another nose piece alternative, suggested by Sherri in the comment section below…
“The best nose wire is plastic coated copper wire such as is found inside low voltage underground sprinkler wire. Cheap and ready available at Lowe’s at the wire cutting area. At 62 cents a foot for the wire, you’ll need to peel off the black coating to reveal 5 little wires that are perfect for your nose wires.”
To have your mask fit snugly, but not too tight, a great option is to use stretchy knit ties that you can tie securely but comfortably. (For more information on how to easily make your own knit ties with t-shirts or leggings you have at home, check out our post, How to Make Ties for Face Masks using Knit Fabric.)
While most people prefer to have their masks knit ties or elastics loop around their ears, (the majority of people I make masks for request ear loops too,) it does create a much better fit if you use ties that go around the top of the head and the back of the neck.
This can be two sets of ties or one long knit strap/elastic that loops around the top of the head and ties at the base of the neck.
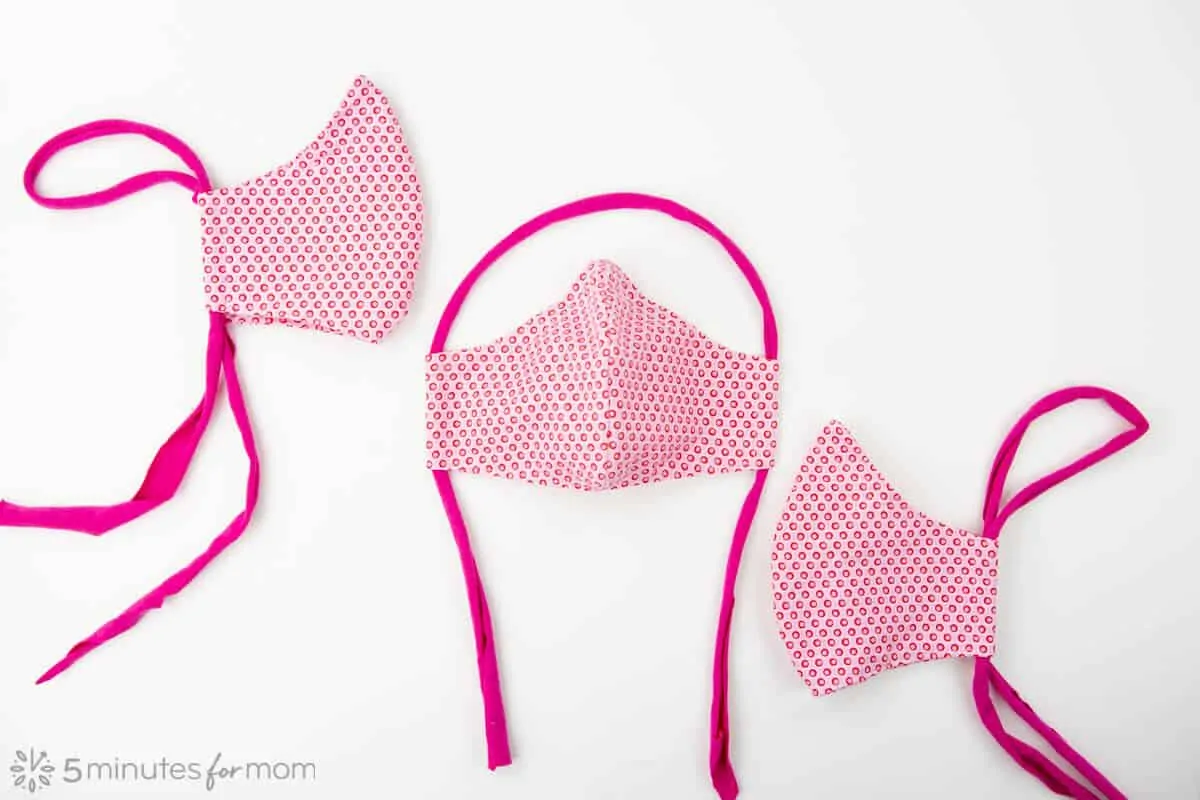
By having the elastic/ties around the head and the neck, you can tie the mask on firmly without tugging or hurting the ears.
N95 masks always have elastics that go around the top of the head and the base of the neck because ear loops simply can’t make the same airtight seal that ties around the head and neck can.
Alternatively, you can use an “ear saver” that stretches across the back of the head and attaches to the ear loops to relieve the ears from the pressure of elastics pulling on ears.
If you have to wear a mask all day and you want an airtight fit, we strongly suggest using knit straps or elastic that fits around the head and the back of the neck.
Finally, to have the best fitting face mask, you want to have the right size mask that is made with a well-designed pattern.
We have spent months developing face mask patterns, testing, and adjusting our pattern designs until we have the best possible fitted face mask pattern in nine different sizes.
Our mask pattern allows for less coverage over the face and neck, eliminating extra fabric and bulk, to keep the wearer as cool and comfortable as possible while still ensuring the best seal and protection for a cloth face mask.
While pleated face masks, such as our DIY Cloth Face Mask Pattern and our Pleated Face Mask with Filter Pocket Pattern, can fit a wide range of face sizes, a fitted face mask requires more accurate sizing for the most comfortable and snug fit.
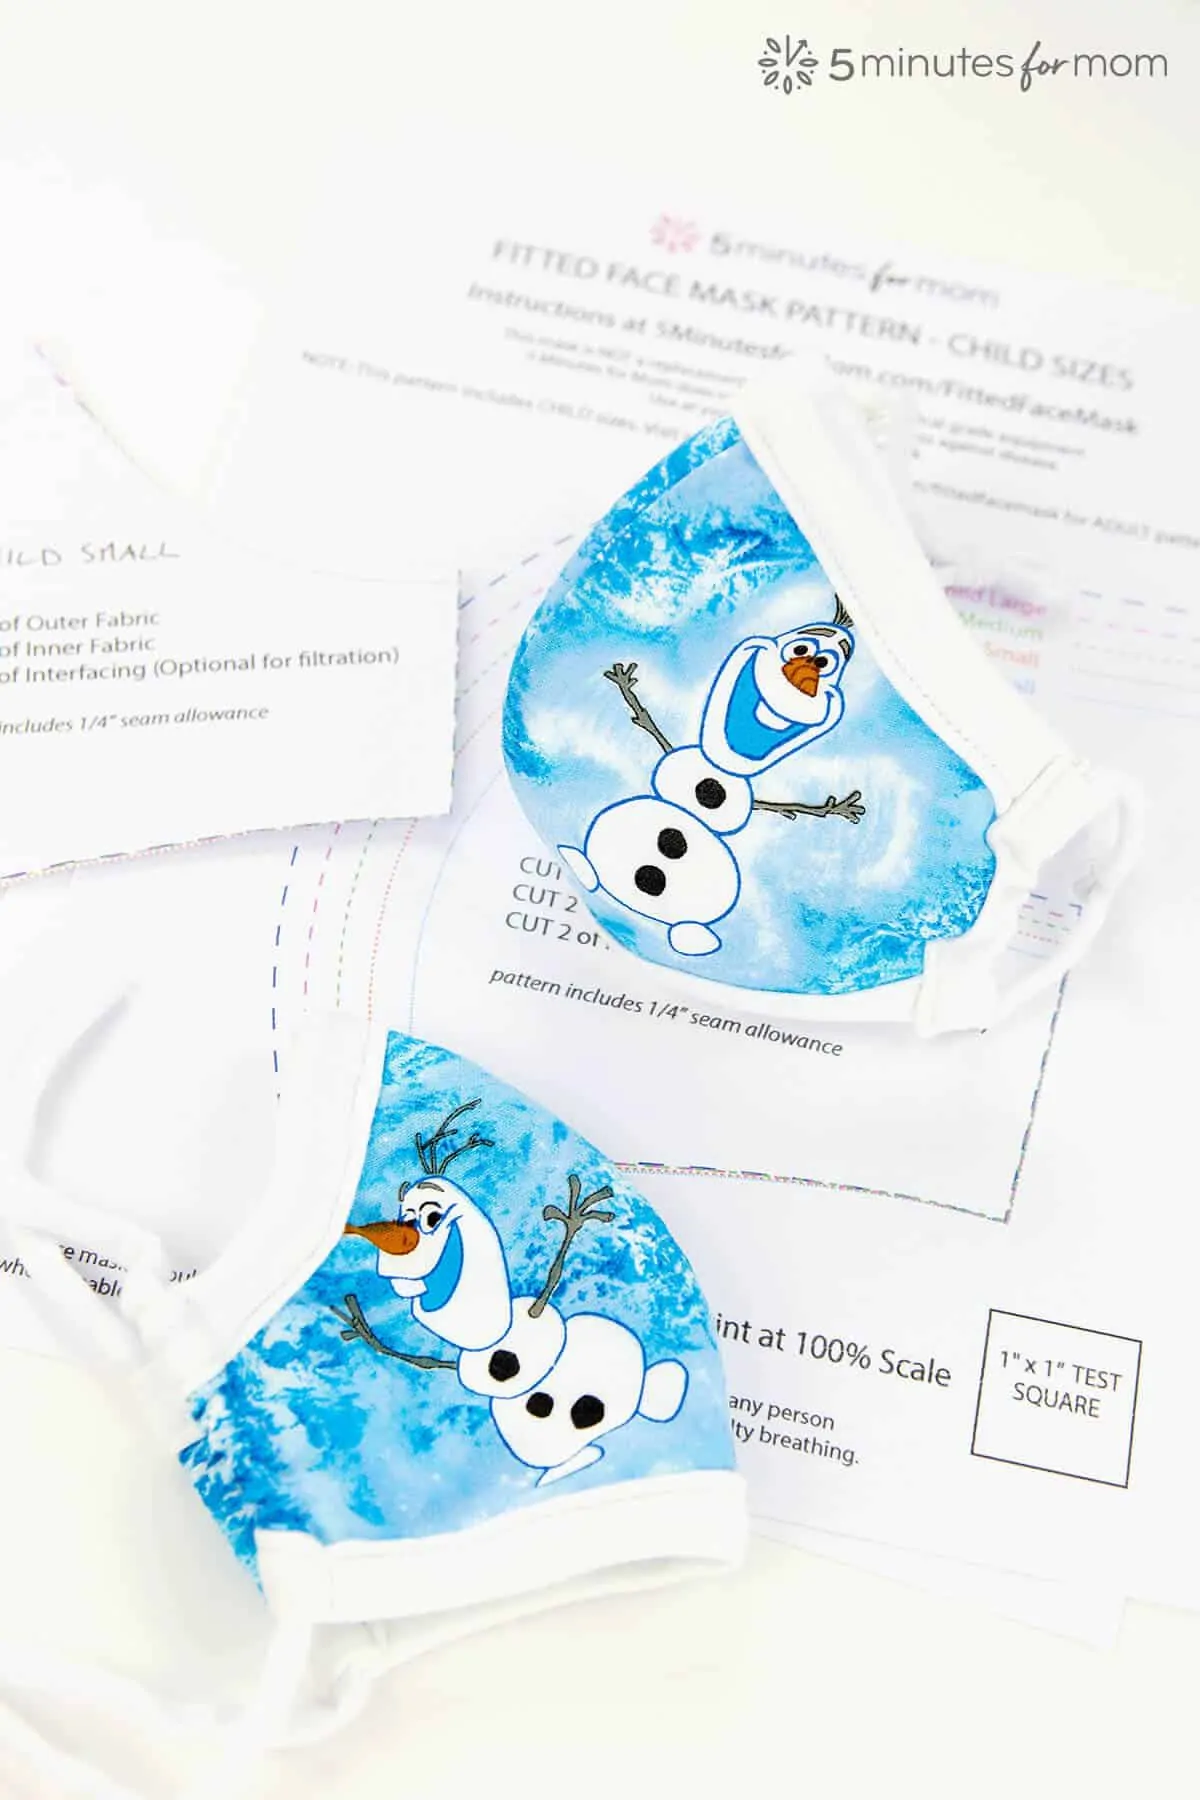
So we have developed NINE sizes of our Best Fitted Face Mask Pattern.
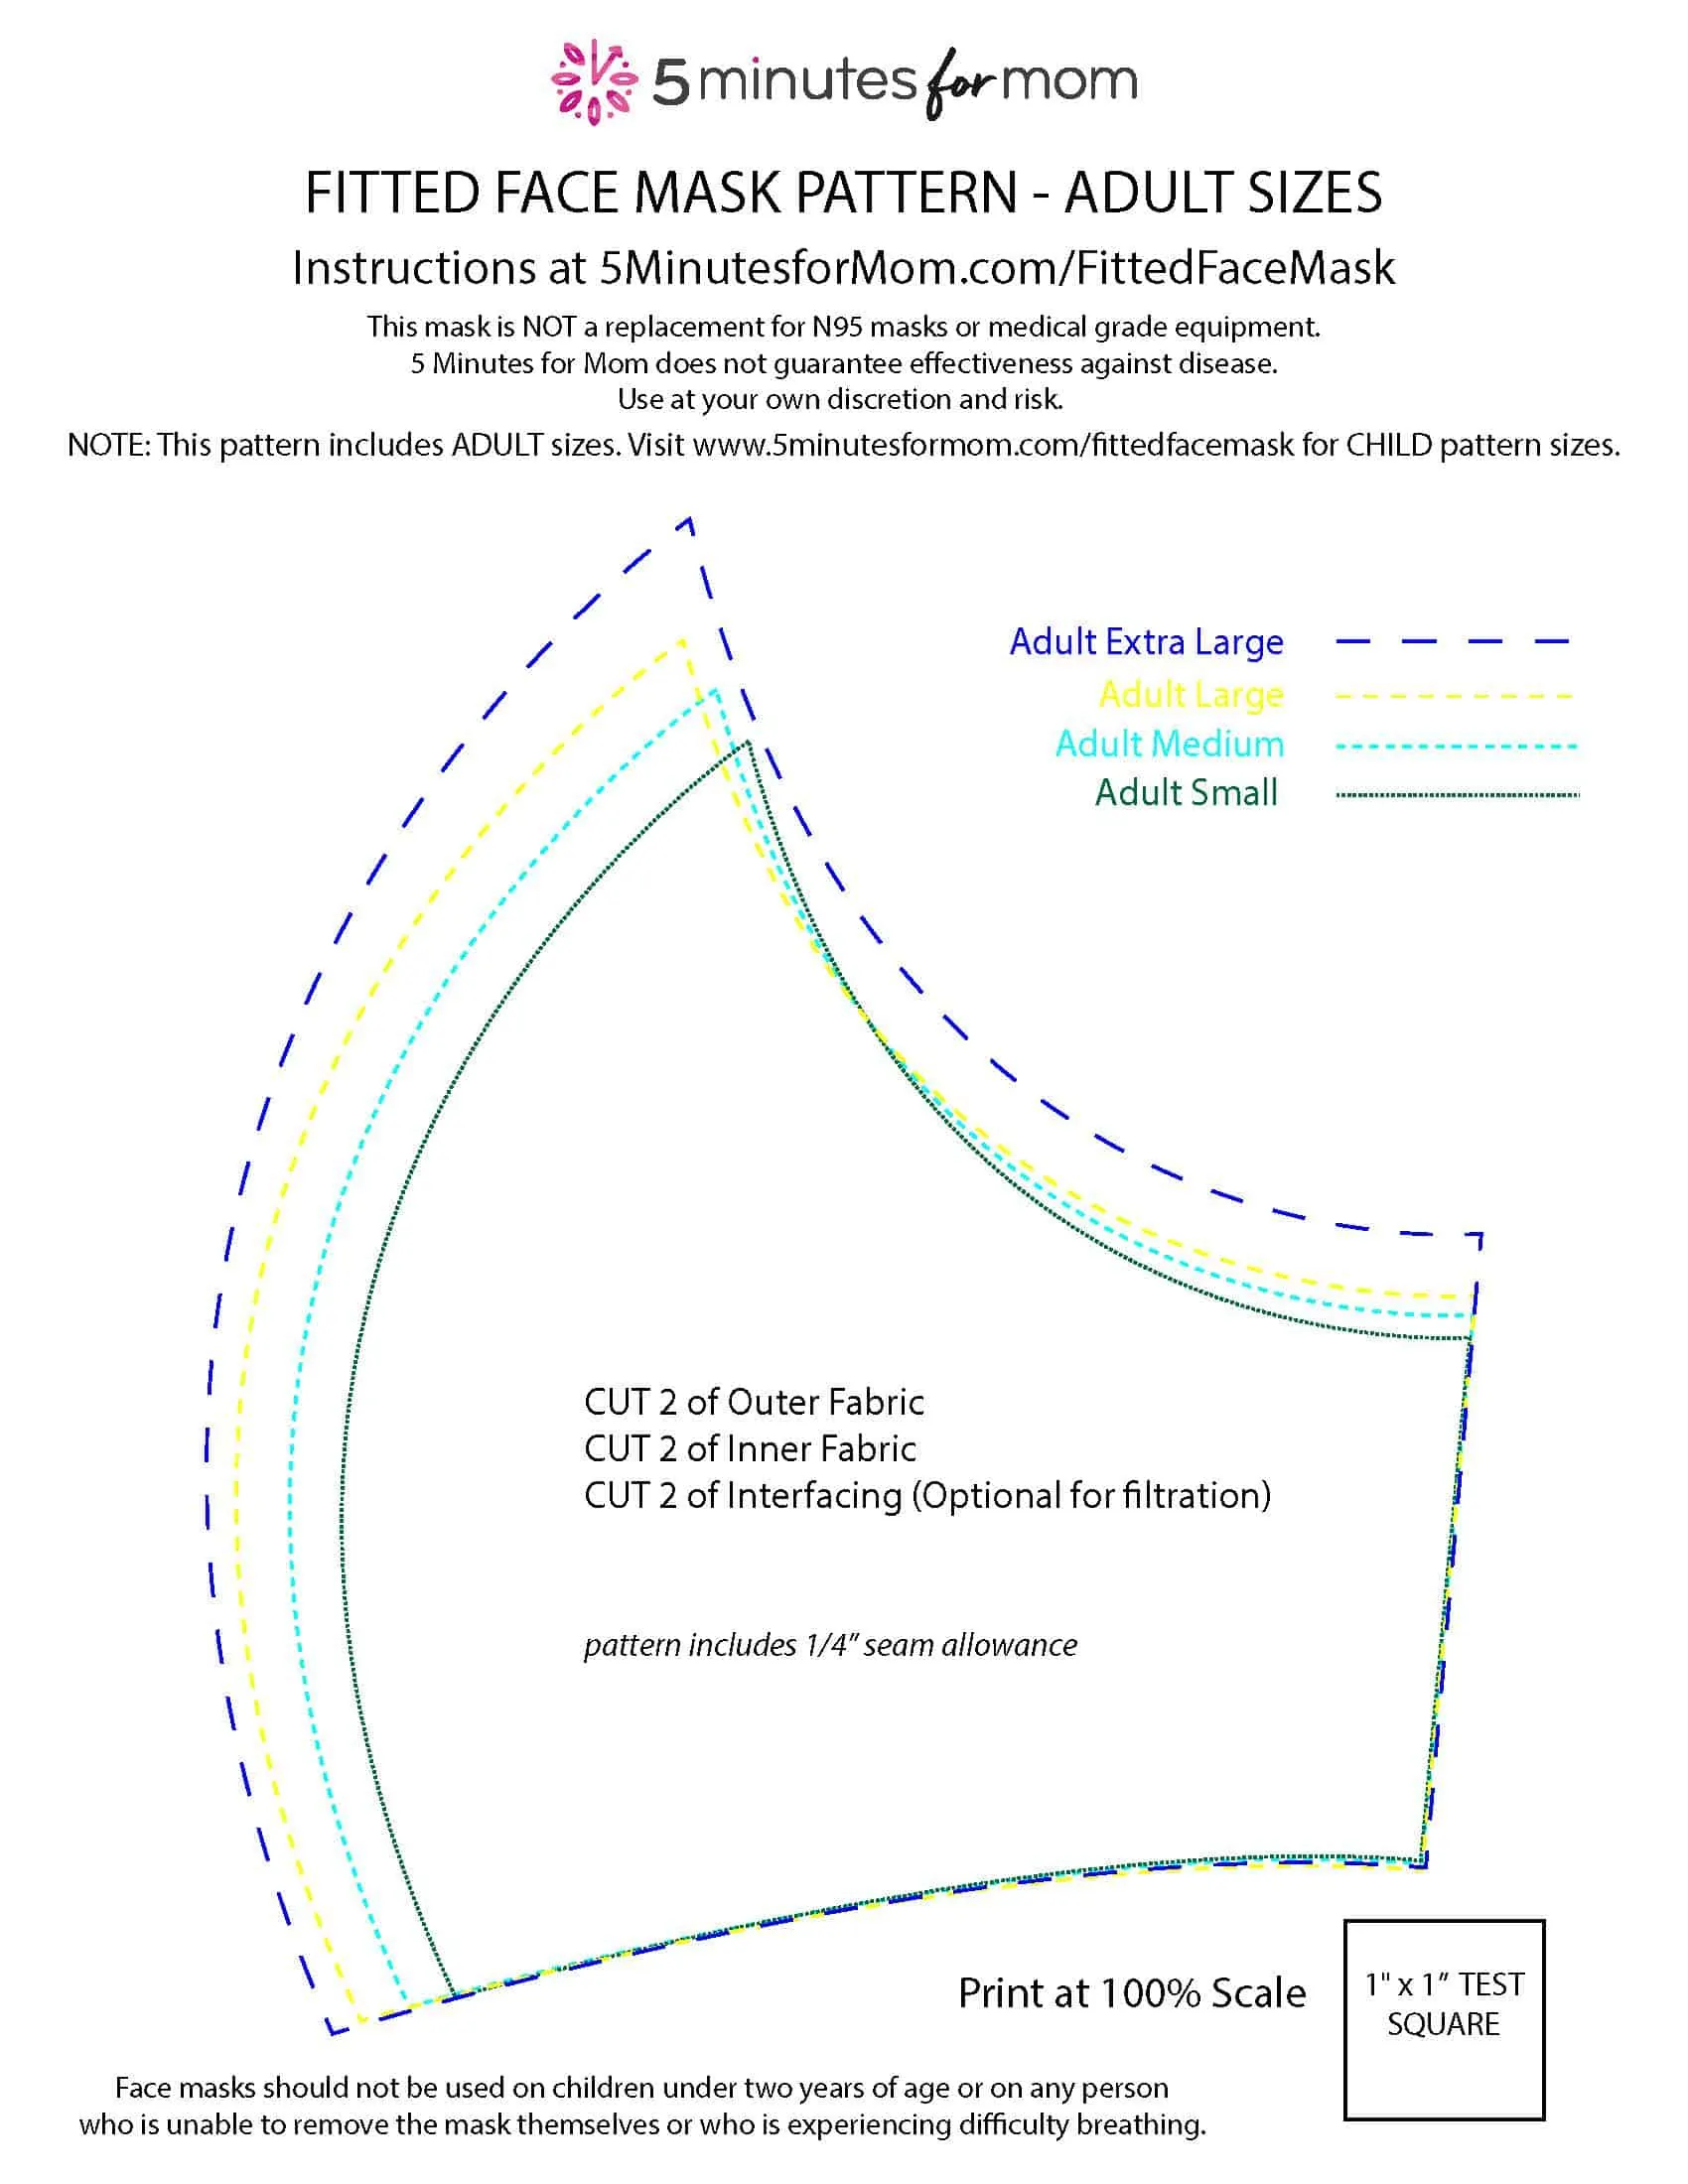
Our adult-size fitted face mask sewing pattern pdf has four adult sizes ranging from small to extra-large. Click here to download Fitted Face Mask Pattern – Adult Sizes.
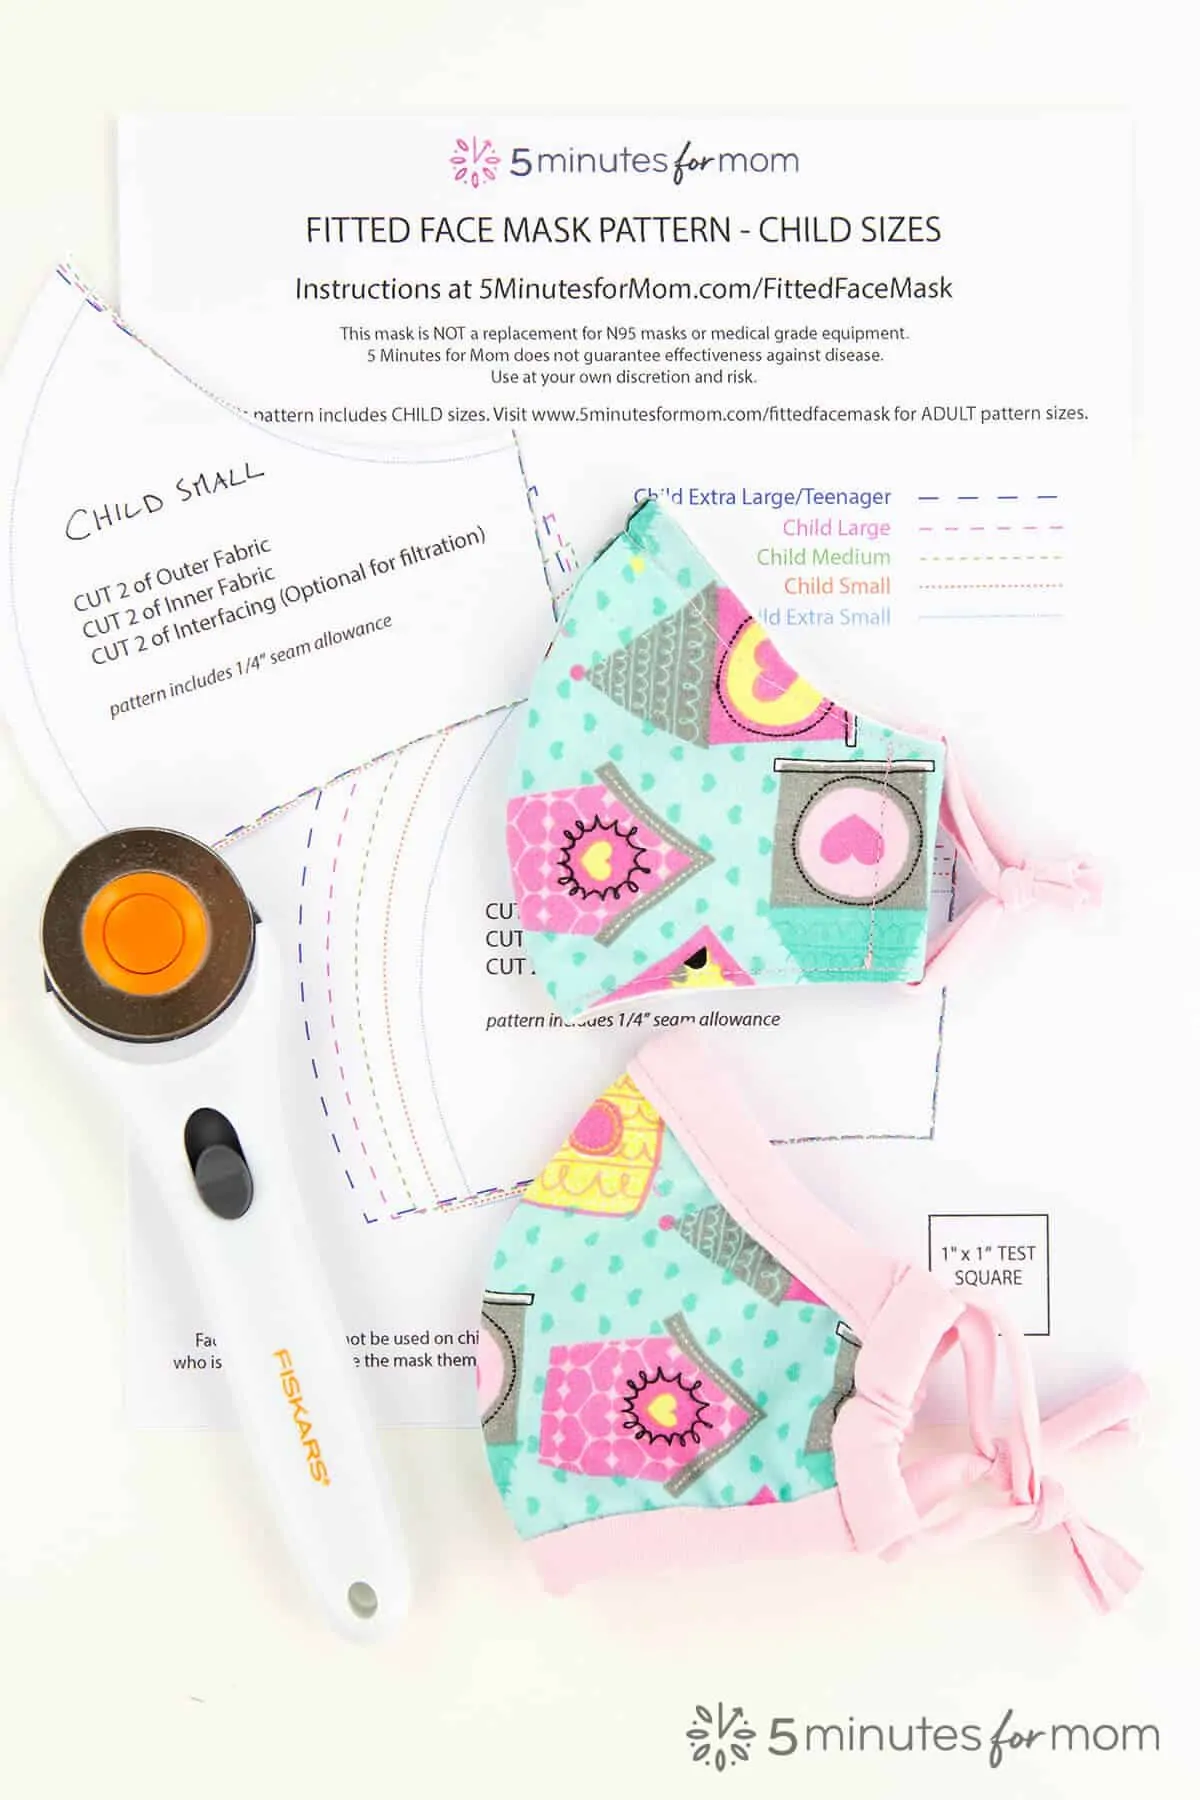
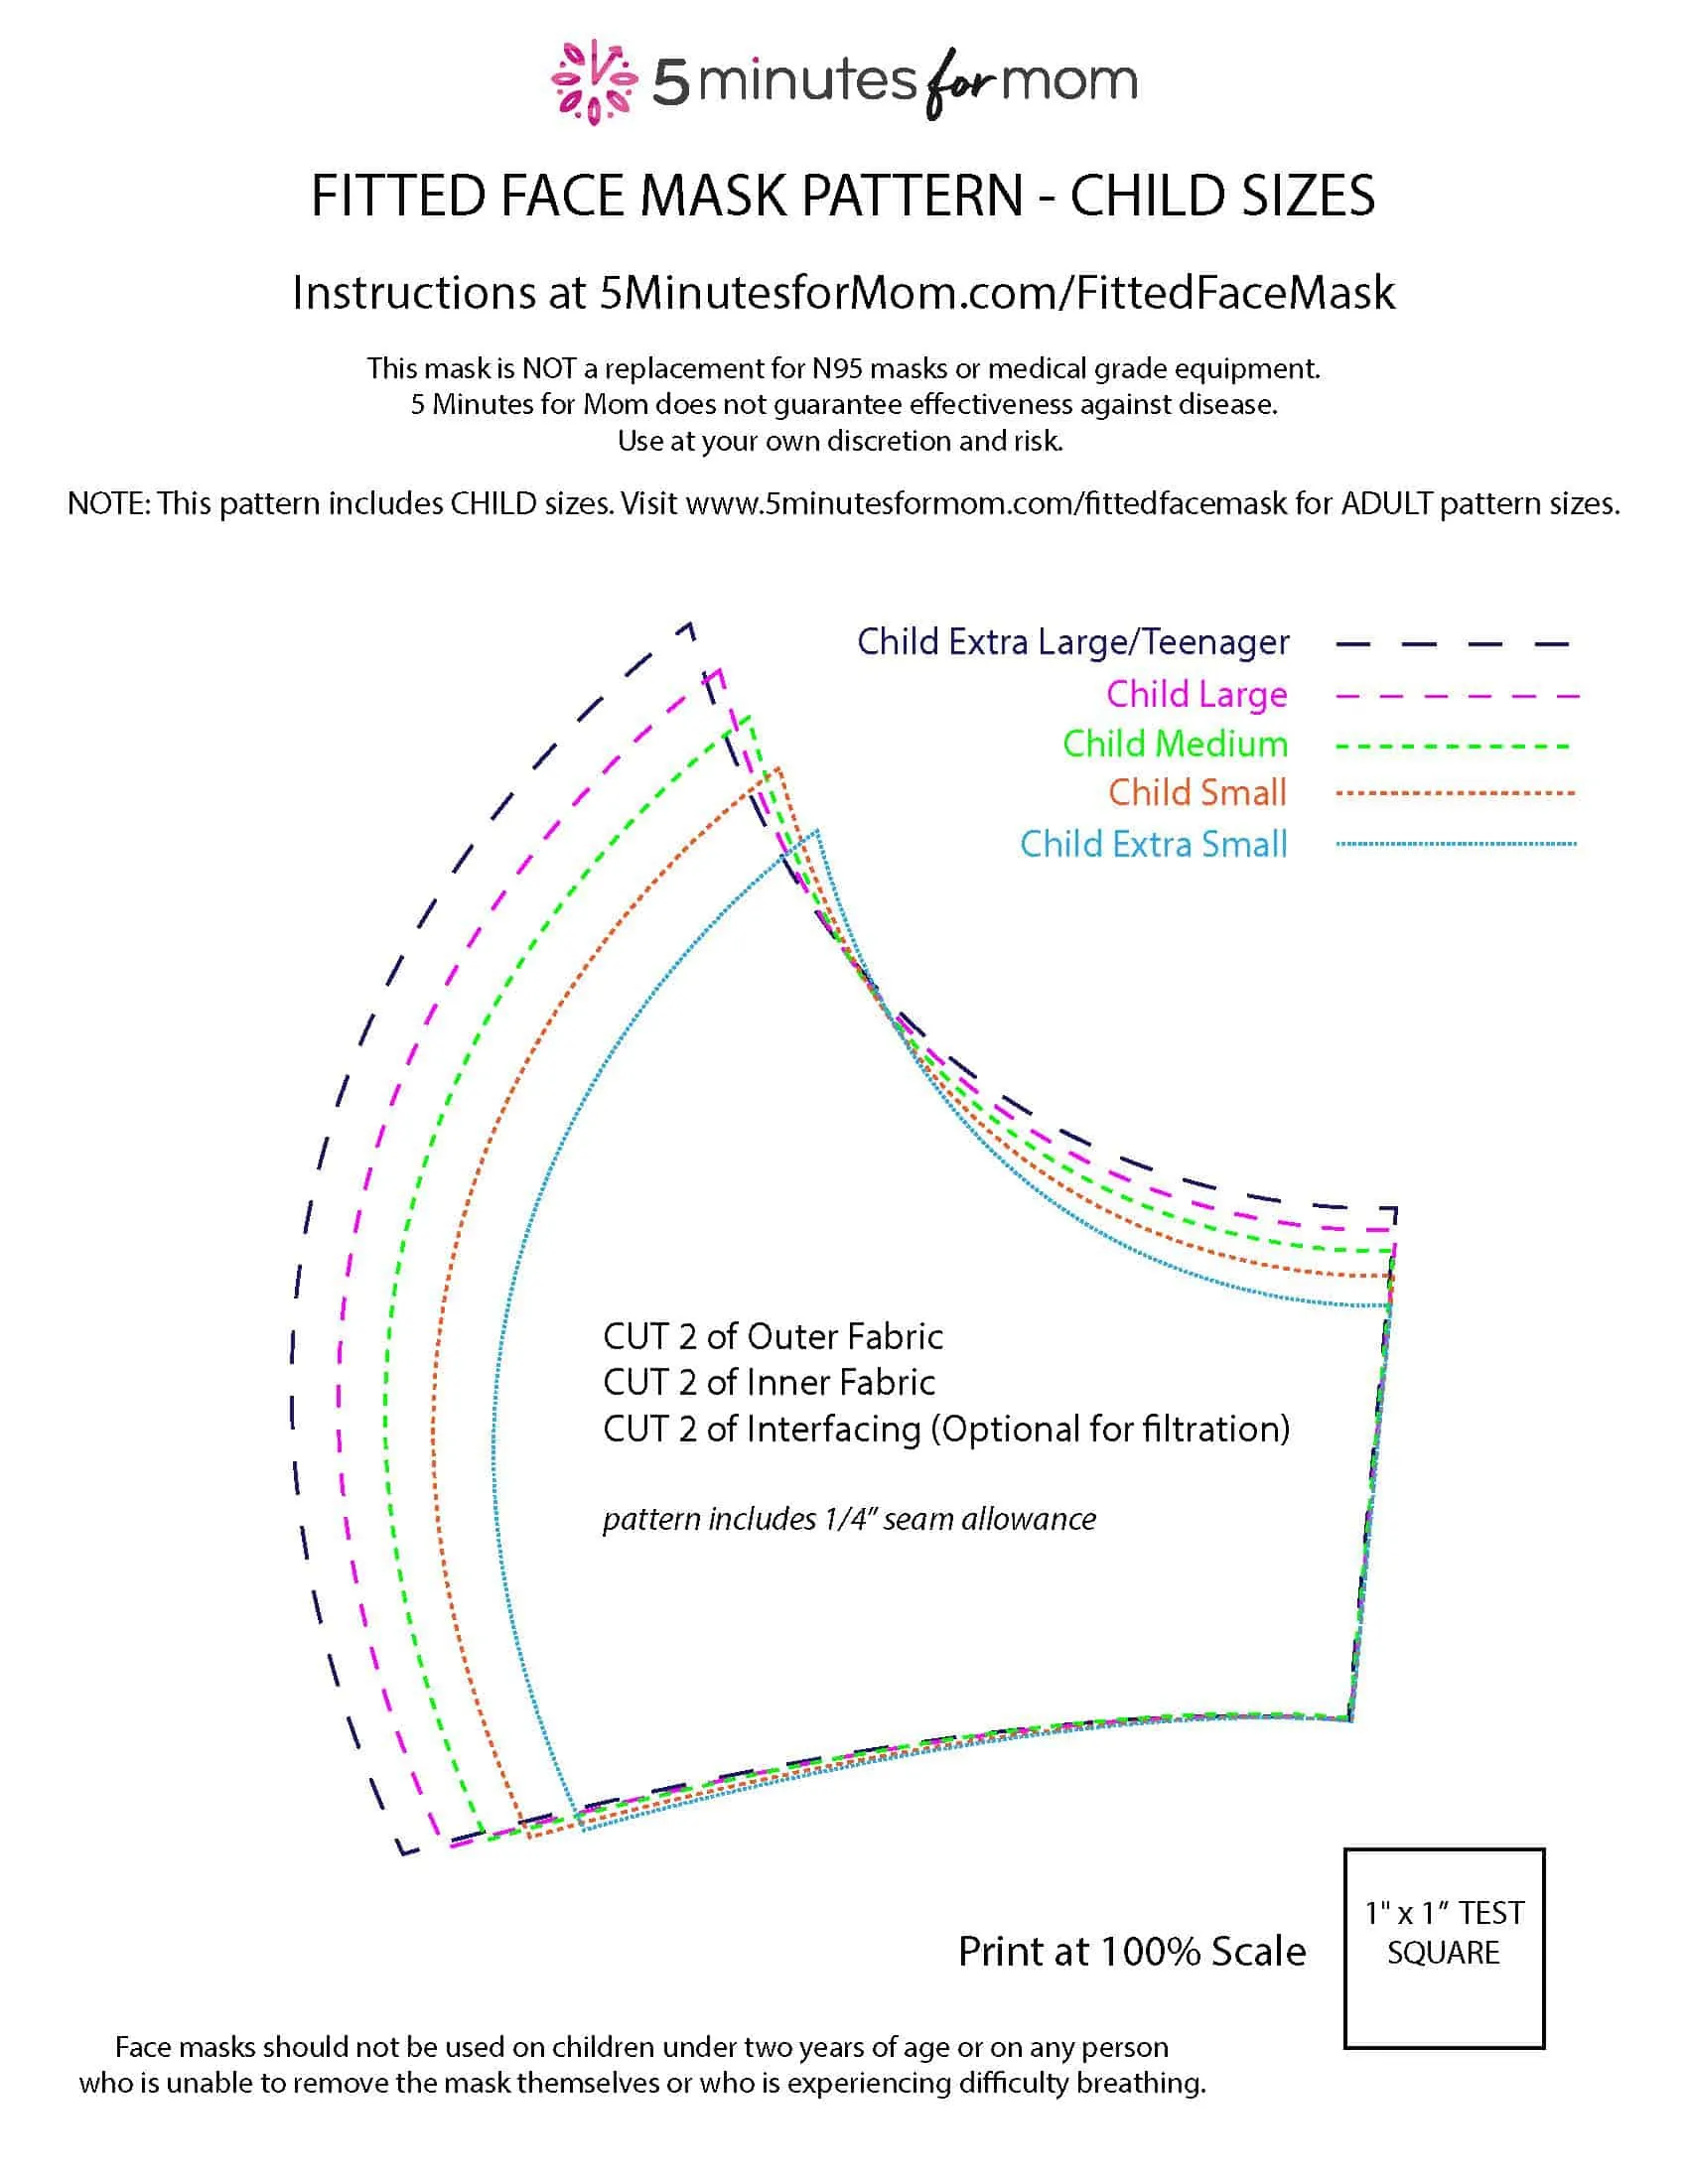
Our child-size fitted face mask sewing pattern pdf has five child sizes ranging from Child Extra Large/Teenager to Child Extra Small. Click here to download Fitted Face Mask Pattern – Child Sizes.
What size fitted face mask pattern should I use?

For our masks, we use non-woven, sew-in, lightweight interfacing. We prefer to use sew-in versus fusible interfacing in order to avoid any glue.
A layer of interfacing does not guarantee filtration but adds another layer of protection while still allowing the mask to be breathable. This interfacing layer is optional, but it helps improve protection. Cloth face masks are NOT replacements for N95 masks.
Below you’ll find links to two printable pdf files – one that includes four adult sizes and one that includes five child sizes – as well as printable pattern instructions.
1. Print Pattern
Download and print our free Best Fitted Face Mask Pattern in Adult Sizes or Child Sizes. Cut out the appropriate size pattern piece.
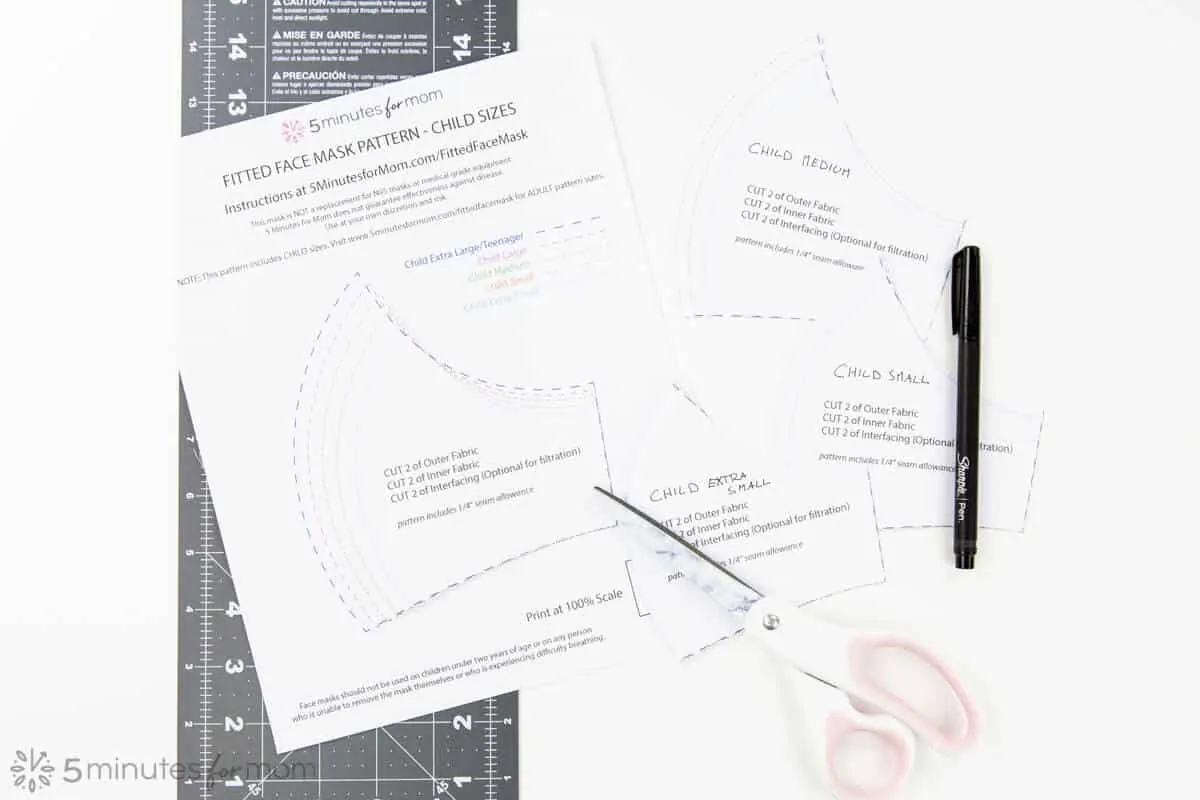
(You may wish to print multiple copies of the pattern so that you can dovetail the pattern pieces in order to make the most use of your fabric.)
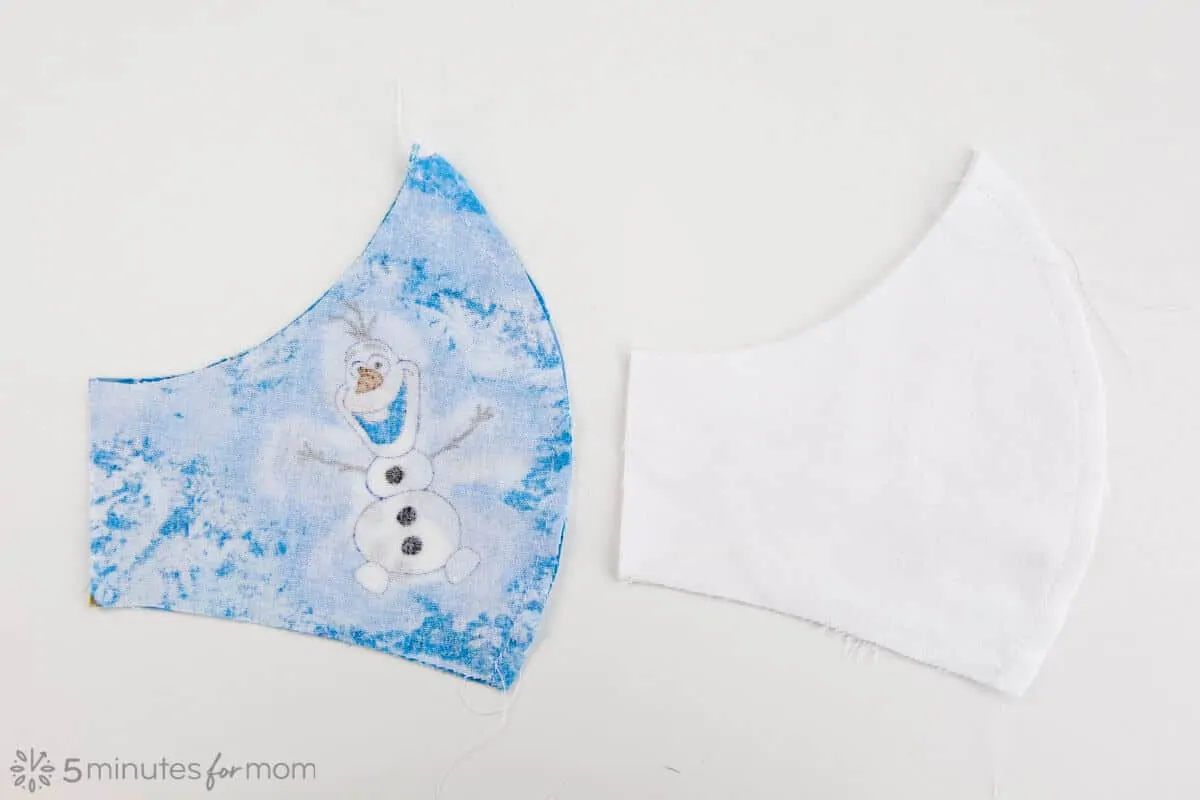
2. Cut Fabric
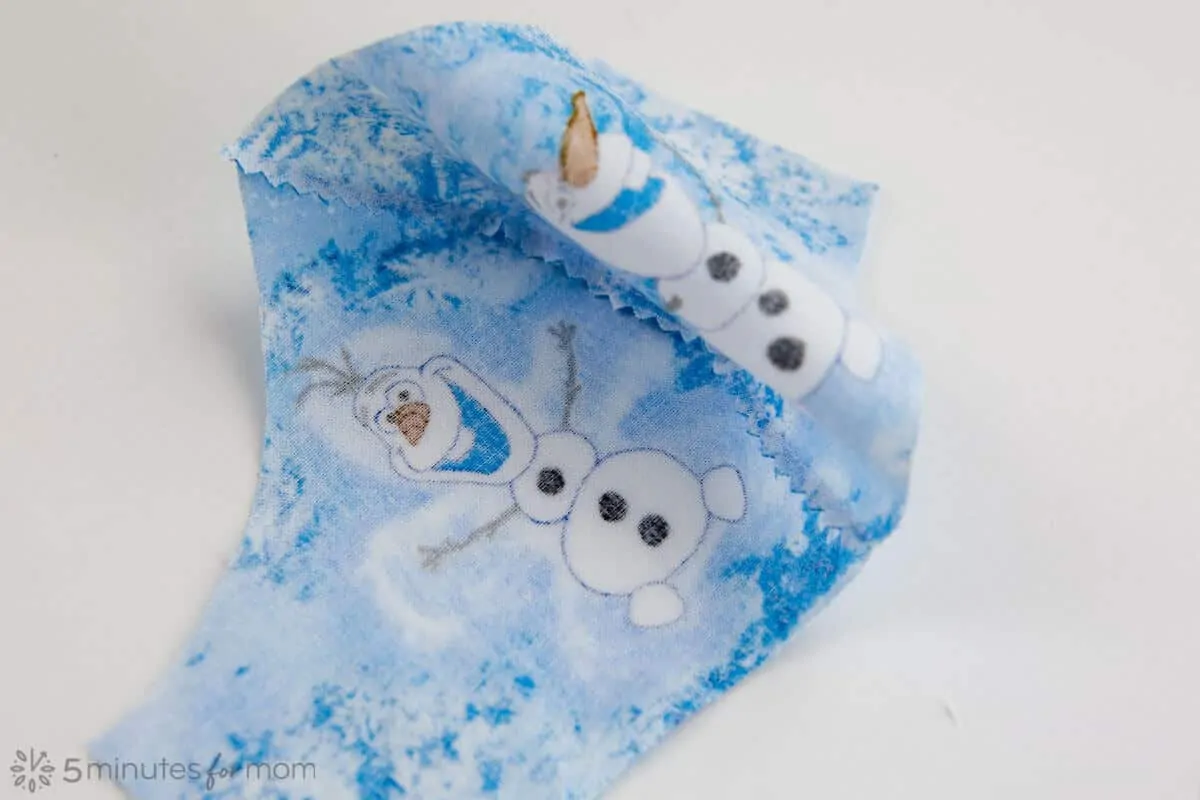
Fold the fabric for your outer part of your mask in half. Cutting the fabric while it is FOLDED with the pattern piece will result in TWO mirrored pieces.
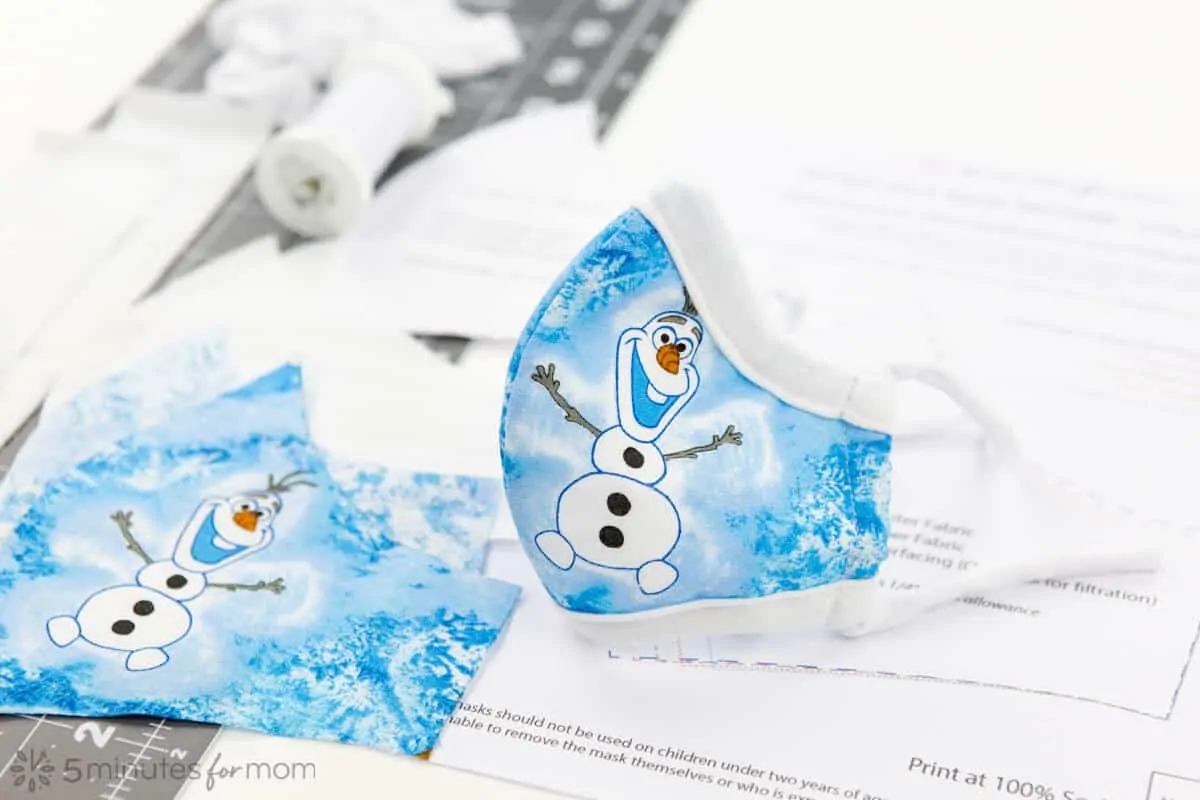
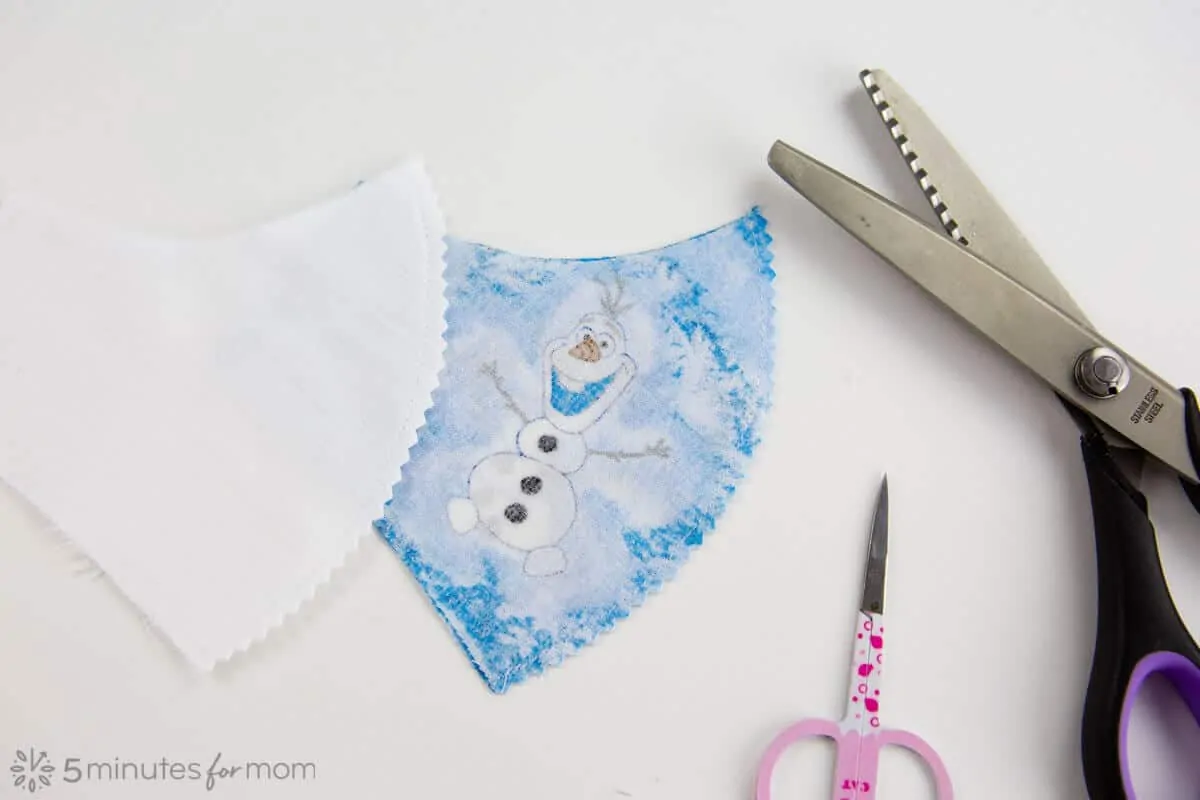
If you are using patterned fabric and you wish to place the pattern in specific areas, (for example to have Olaf in the right position on your finished mask,) you will need to mirror the pattern (flip it over horizontally) when cutting.
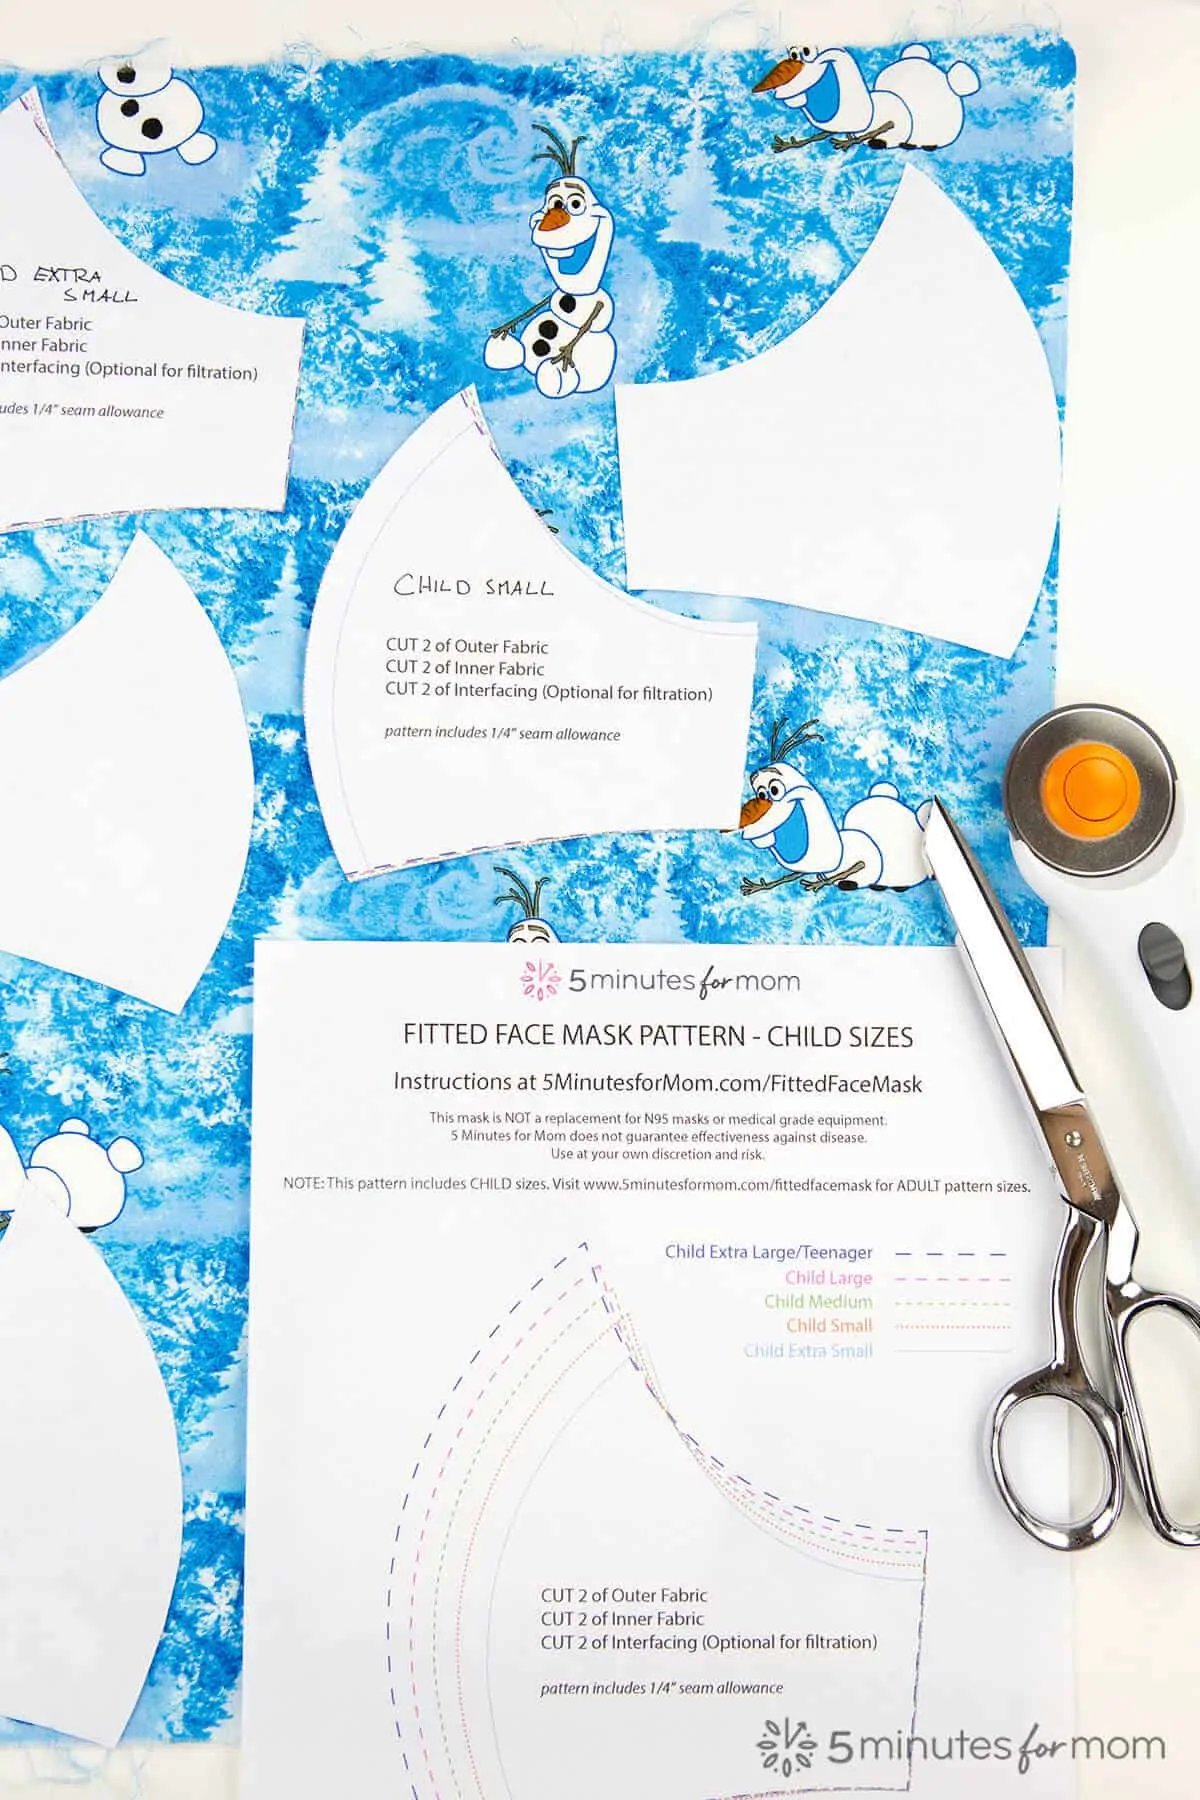
To create a mirrored piece when only cutting ONE layer of fabric at a time, FLIP the pattern piece over horizontally when cutting the fabric for the second piece so that the right side/patterned side of the fabric will be facing the correct way.
Repeat the cutting process with liner fabric, once again cutting while the fabric is folded or flipping the pattern piece for the second cut if cutting one layer of fabric at a time.
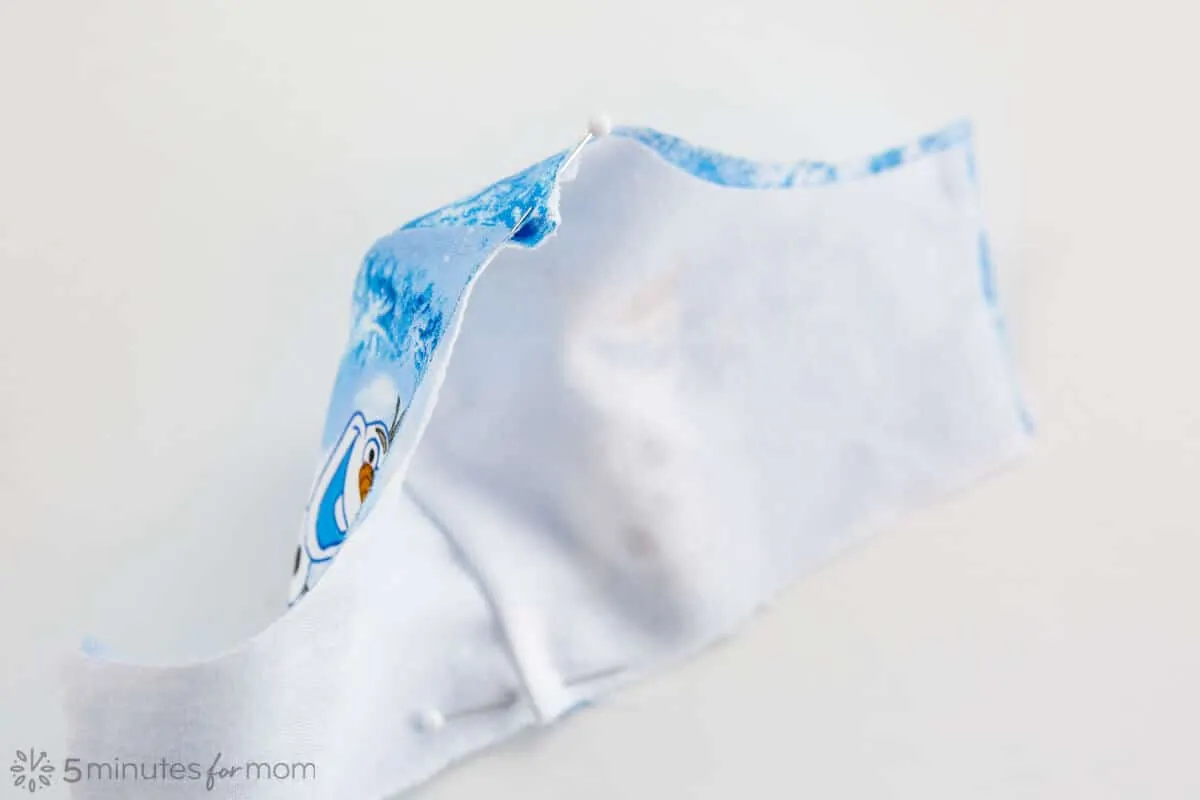
3. Sew Center Seams
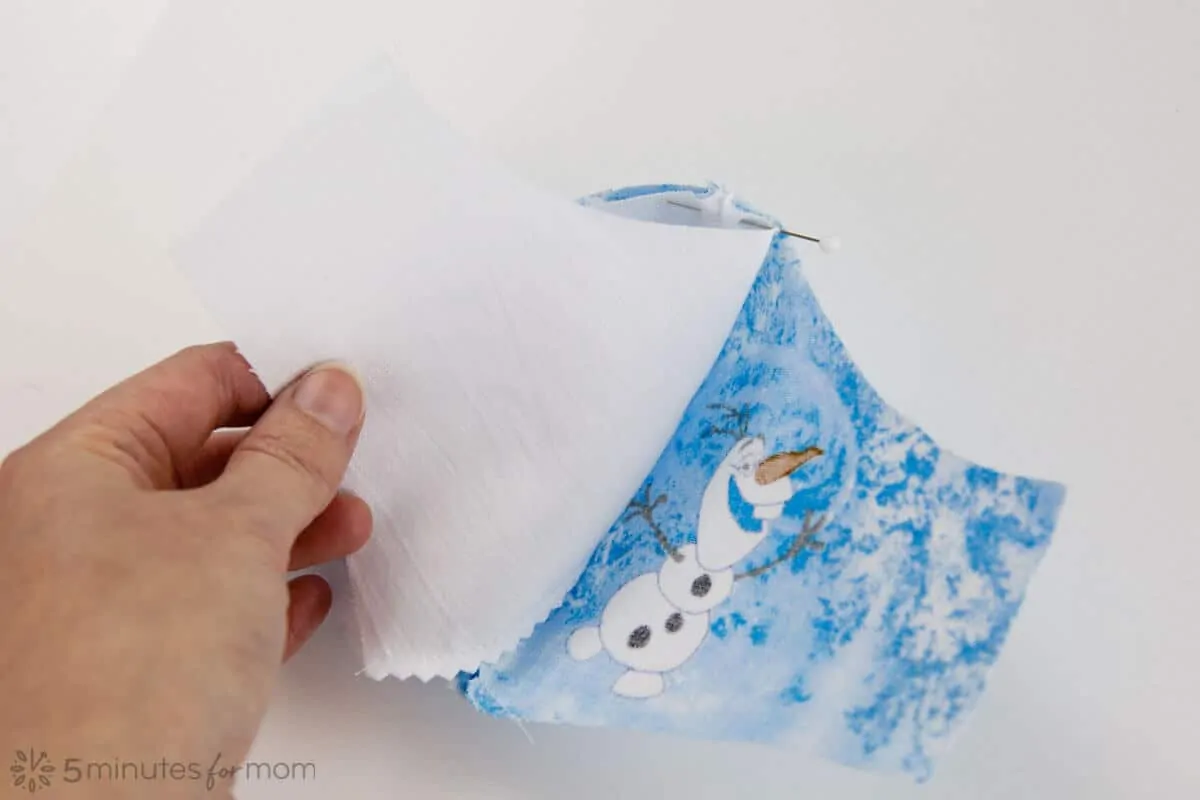
With RIGHT SIDES (the nice sides of the fabric) together, sew the center seam on the outer fabric pieces and on the lining fabric pieces with a 1/4″ seam allowance.
NOTE: if adding the interfacing layer, sandwich the two interfacing pieces around the outer fabric pieces before sewing center seams and sew the center seam with the four layers as shown below.
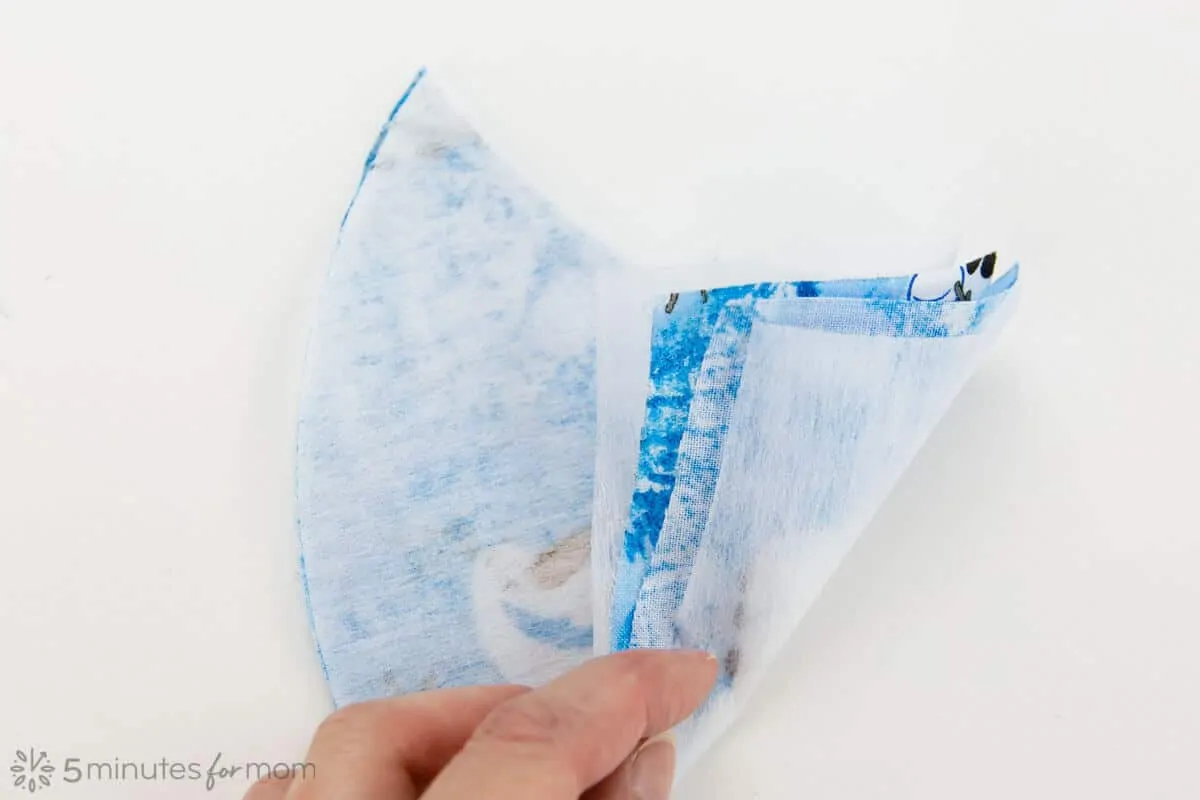
Trim seam allowances and/or use pinking shears to reduce fabric bulk.
4. Sew Layers Together
If adding the knit trim/binding, use the following directions. If not using knit binding, click over to follow directions for the fitted face mask without binding in our Fitted Face Mask Tutorial Part 2.
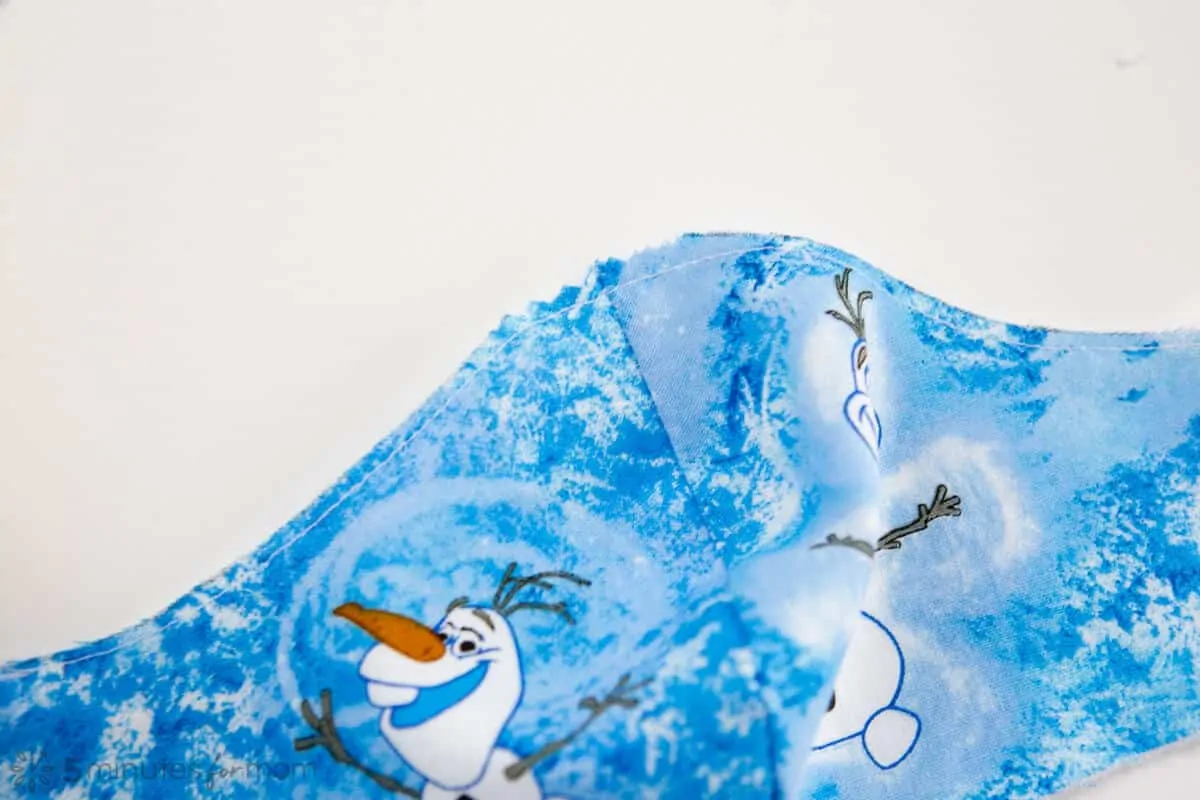
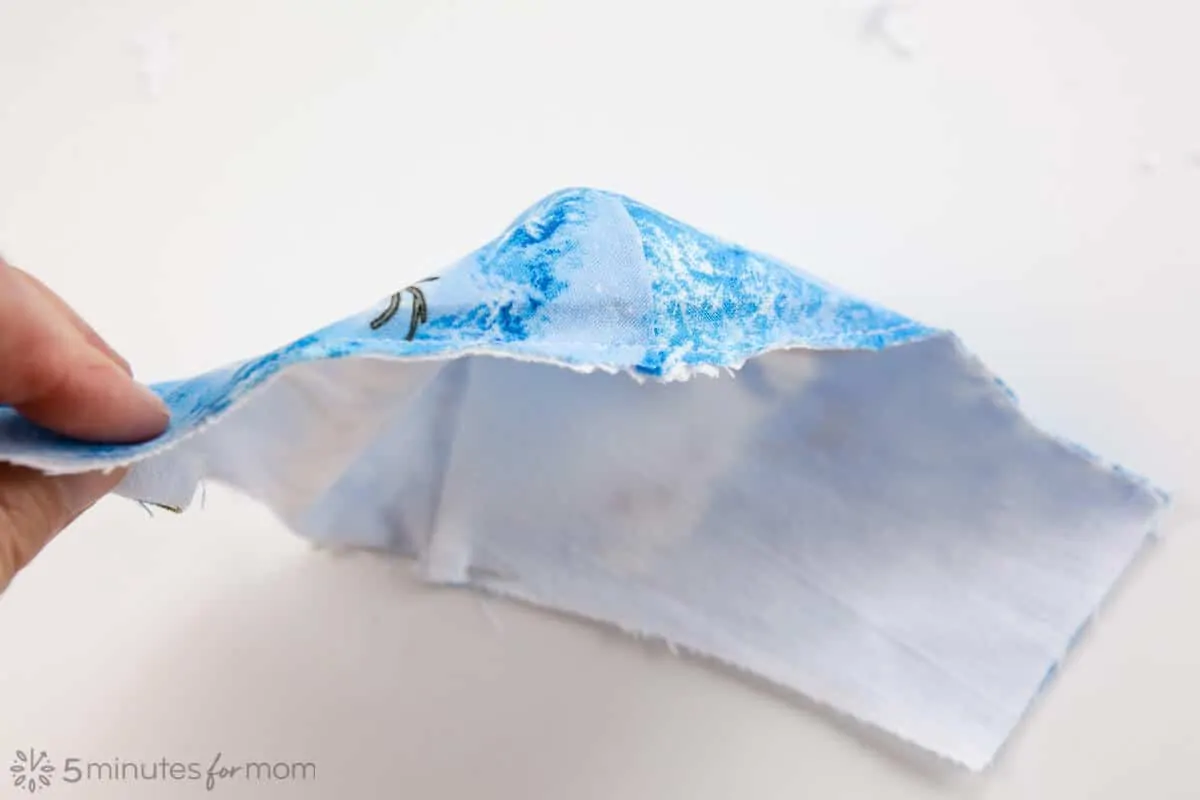
Finger press (or press with an iron) the center seam to one side of the mask on the outer layer. On the lining layer, press the center seam to the opposite side.
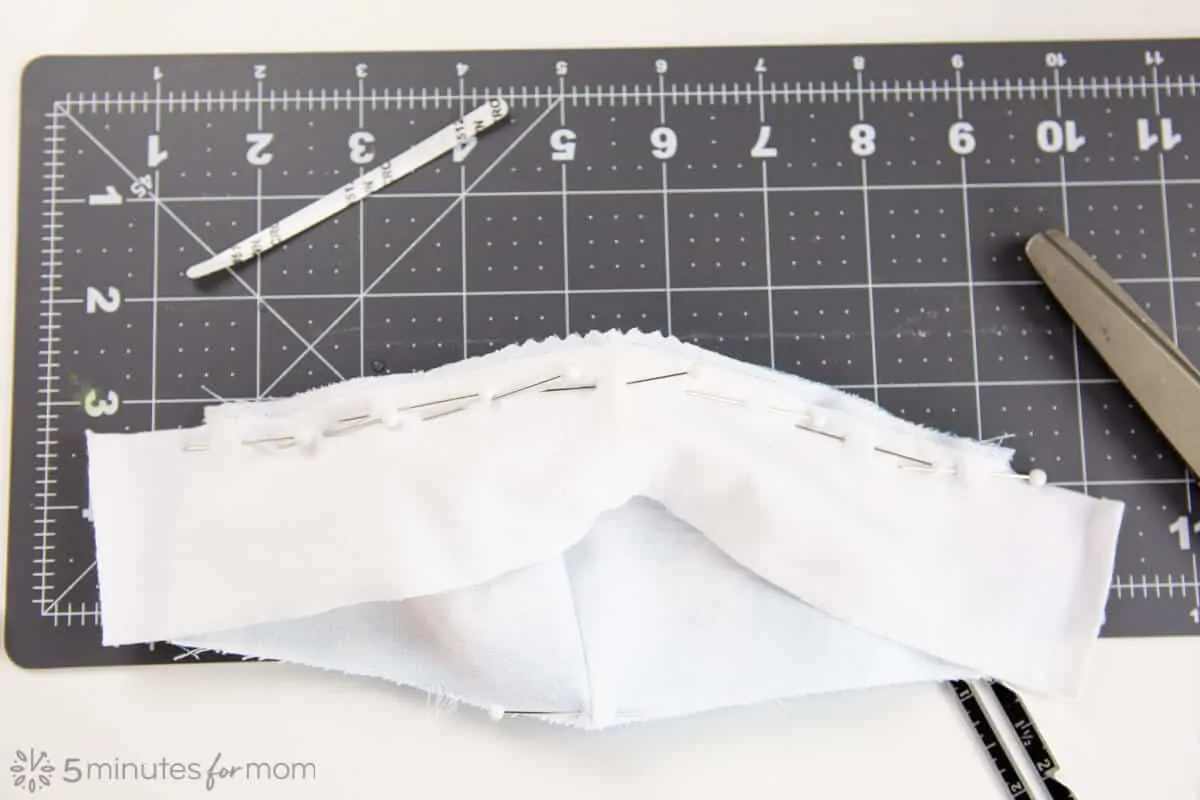
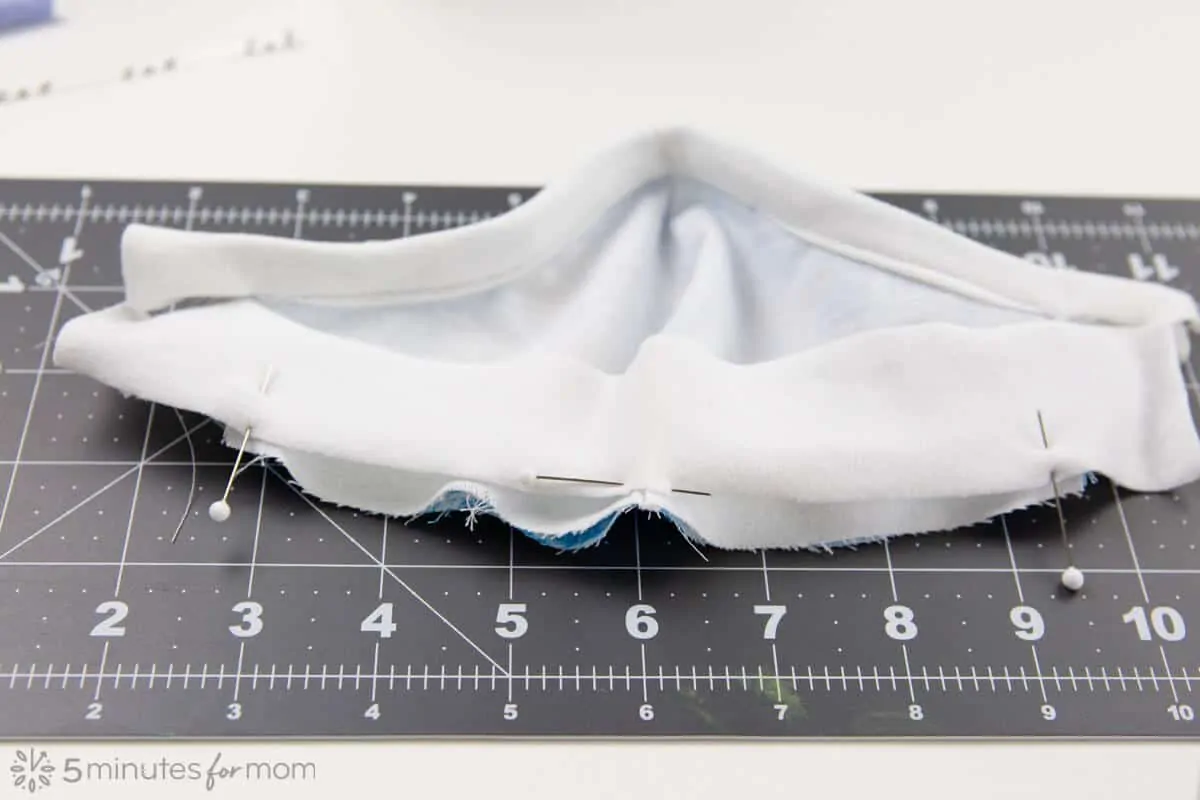
With WRONG SIDES together, so that the right sides of the fabric are facing outwards, pin the outer piece and lining piece together and stitch along top of mask with a seam allowance of 1/4”.
Then trim seam allowance, rounding the top corner. (Alternatively, you can sew with a 1/8” seam allowance and only trim/round the top corner, noting that the finished mask will be slightly larger.)
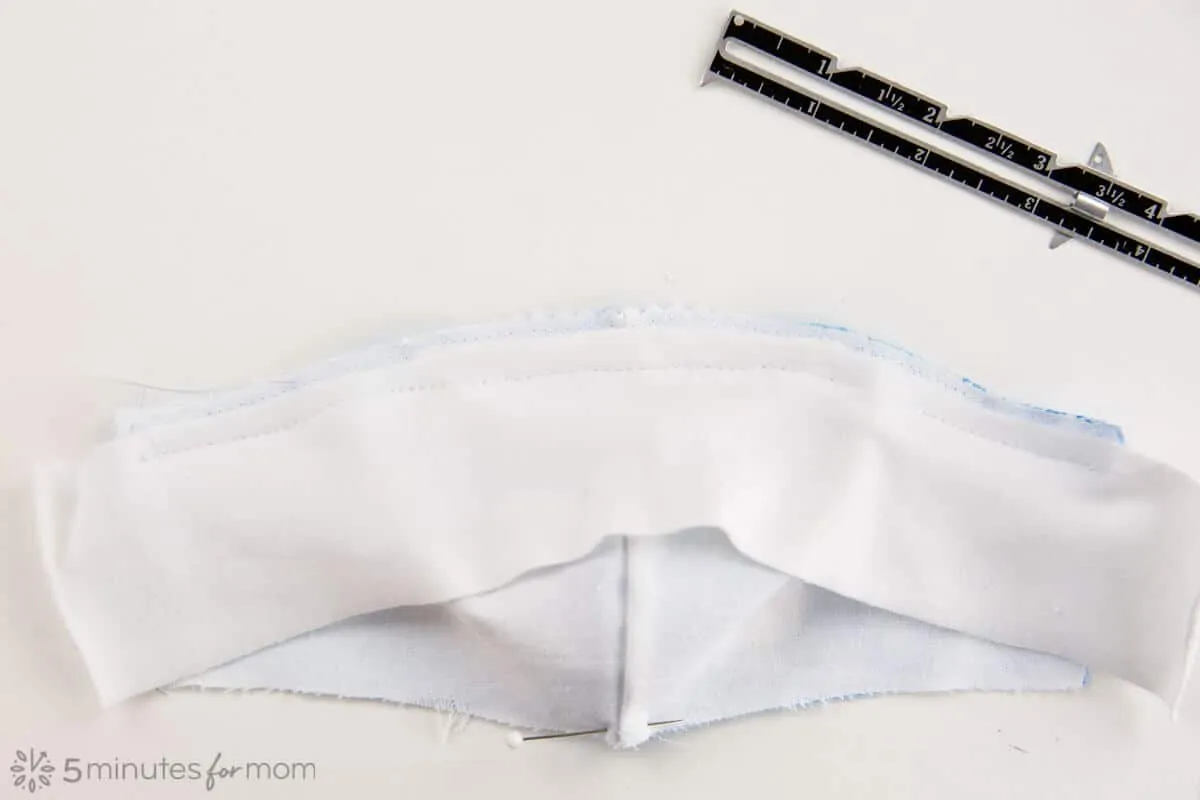
Remove the backing of the flexible nose piece and place the nose wire inside the mask with the sticky sharper side of the nose piece attached to the wrong side of the outer fabric so that the smoother side of the nose piece will face down on your nose for a more comfortable fit.
Place the ends of the nose piece right next to stitching with the center of the nose piece as close to the top of the center of the mask as possible. You may need to bend the nose piece slightly to get the best fit.
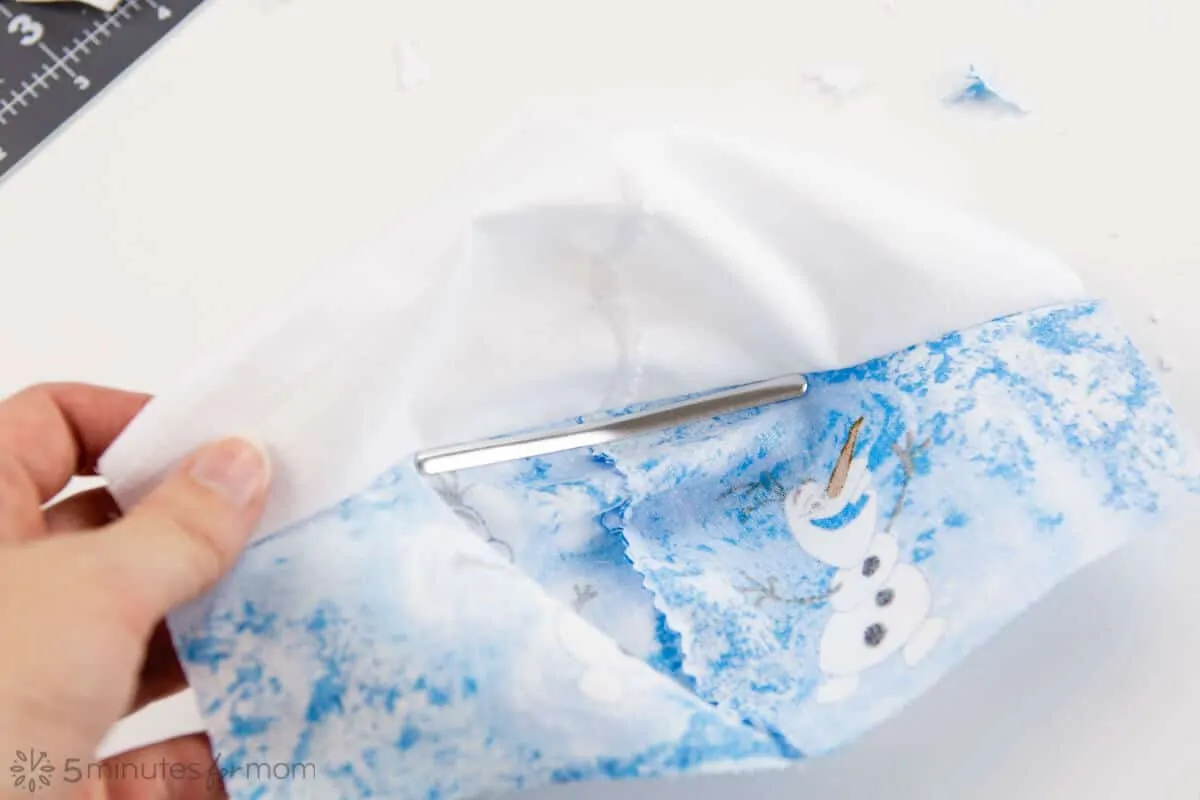
IMPORTANT: Sew a few stitches at both ends of the nose piece to hold the nose piece in place.
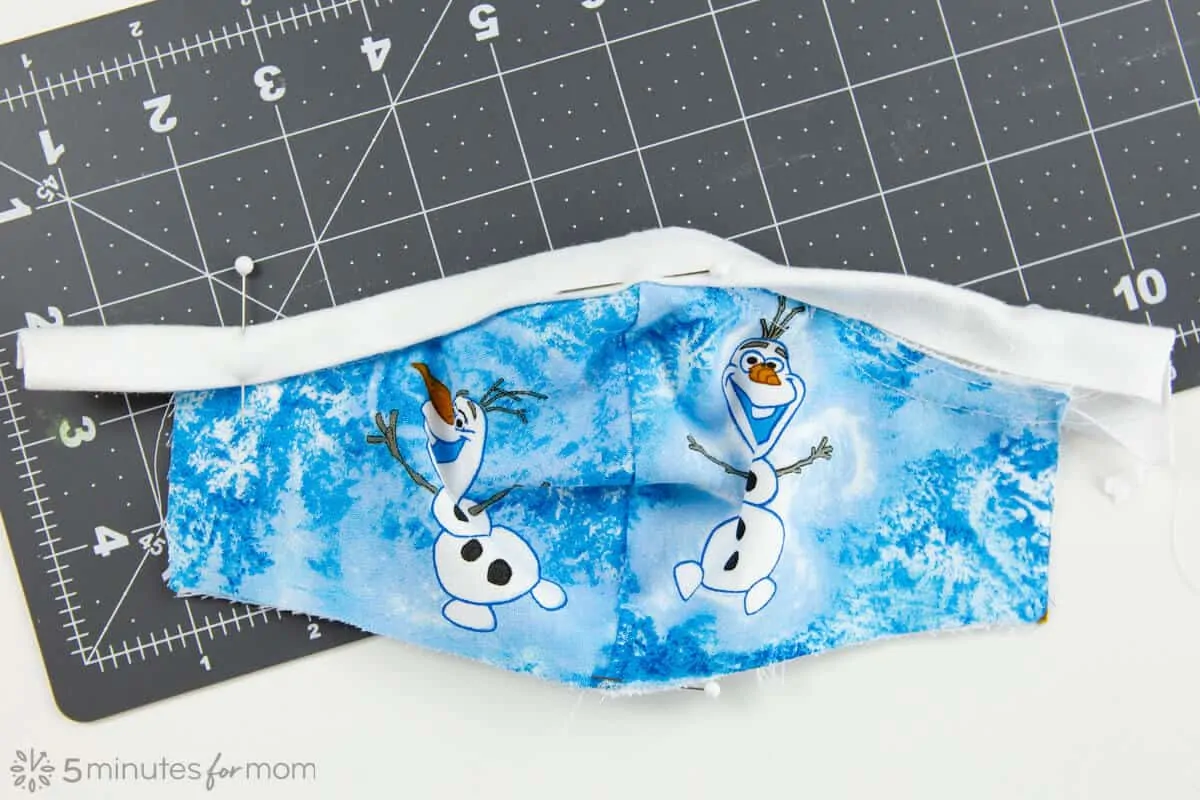
5. Attach Knit Binding
Along the TOP of the face mask, pin the 2″ wide piece of knit binding to the inside/liner side of the mask with the raw edge of the knit binding along your stitching line, slightly stretching the knit fabric for a very subtle gather.
Stitch 1/2” from the raw edge top of mask, sewing VERY carefully below the nose piece. If you hit the nose piece, you will break your needle. So sew slowly and carefully.
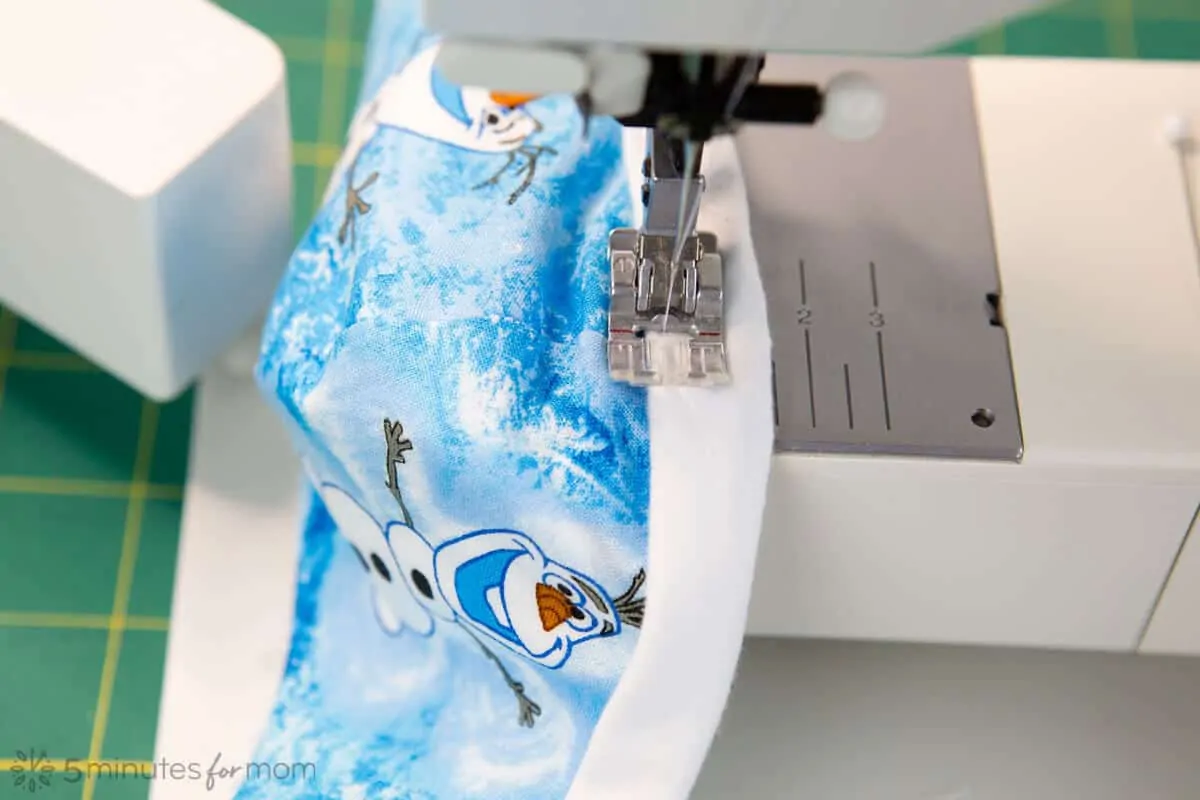
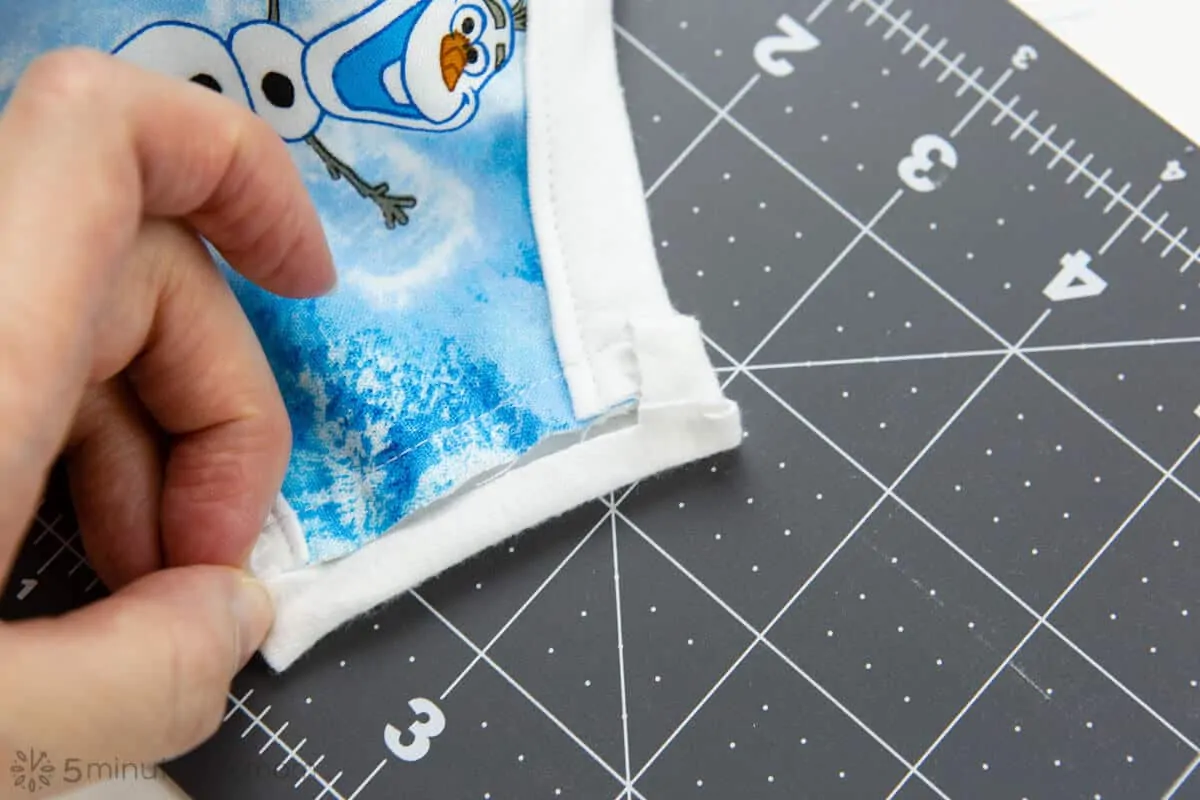
Fold the raw edge of the binding to the raw edge of mask and then fold over to encase raw edges in binding. Pin in place.
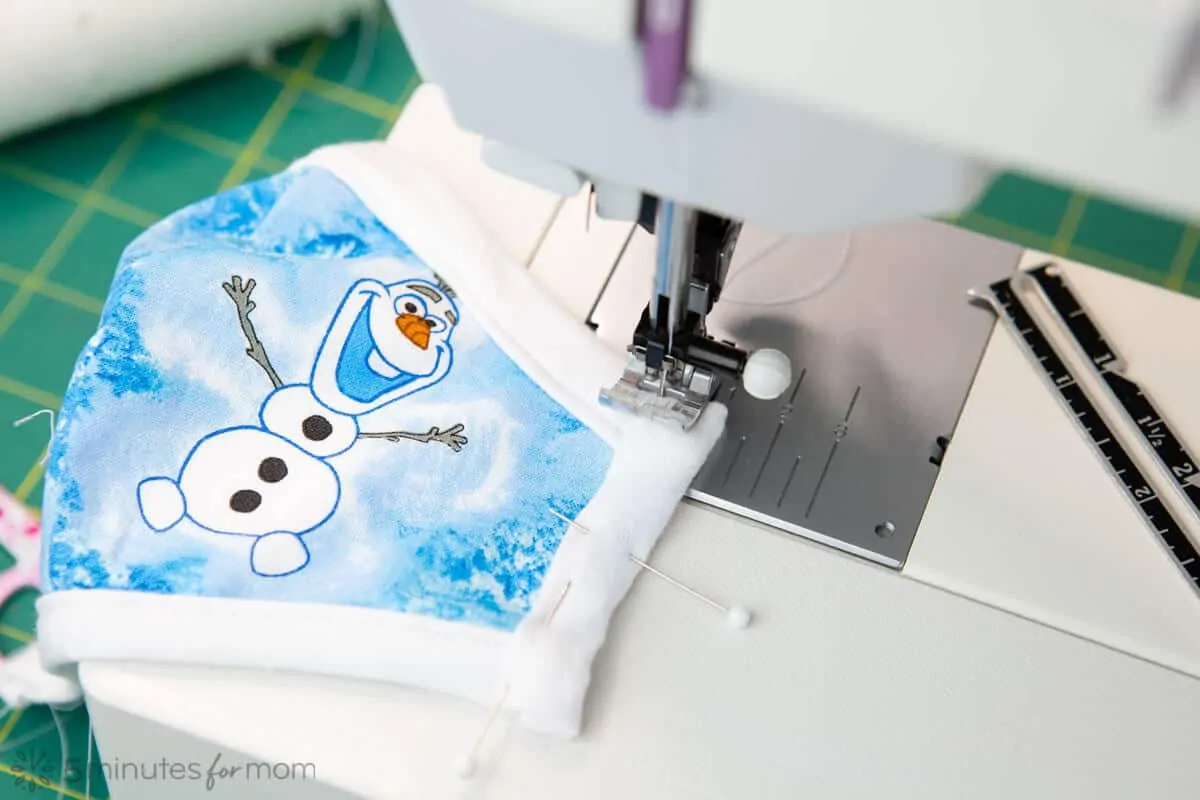
Topstitch binding in place, about 1/16″ to 1/8″ from the folded edge, once again sewing very slowly and carefully around the nose piece. You will probably have to stretch the knit binding slightly to get it to reach over the center of the nose piece.
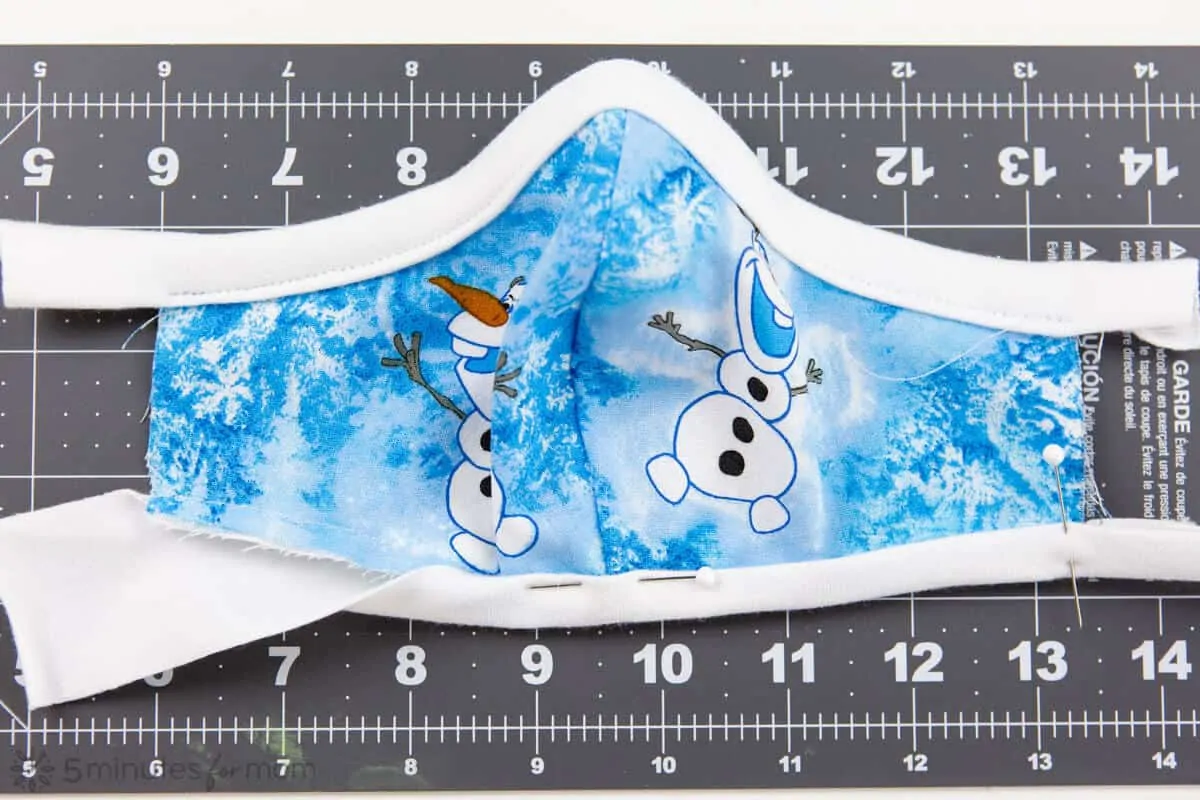
Along the BOTTOM of the face mask, gently STRETCH and pin the 1½” wide knit strip of binding to the inside/liner side of the mask with the raw edge of knit 1/8″ away from the raw edge of the bottom of mask.
For the bottom of the mask, you want to stretch the knit binding more than you stretched the top binding so that there is more gathering on the bottom of the mask for under the chin.
Stitch 3/8″ from the bottom, raw edge of the mask.

Fold the raw edge of the binding to the raw edge of mask and then fold over to encase raw edges in binding.
Topstitch binding in place, about 1/16″ to 1/8″ from the folded edge.
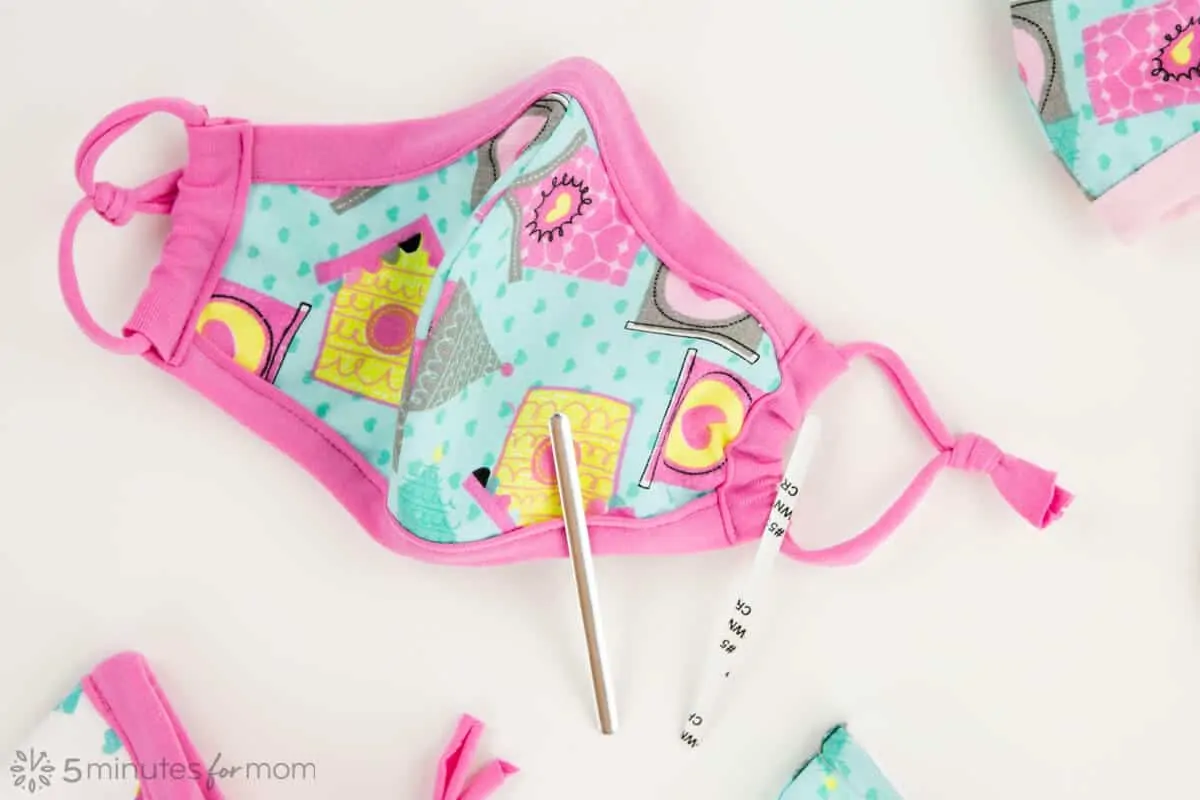
6. Sew Casings/Channels for Ties/Elastic
There are TWO options for sewing the side casings/channels for your knit ties or ear loops. (Note: the mask on the left is a Child Extra-Small and the mask on the left with the knit casing is a Child Small.)

You can simply trim off excess knit binding and then fold over the raw edges twice and stitch down to form a channel.
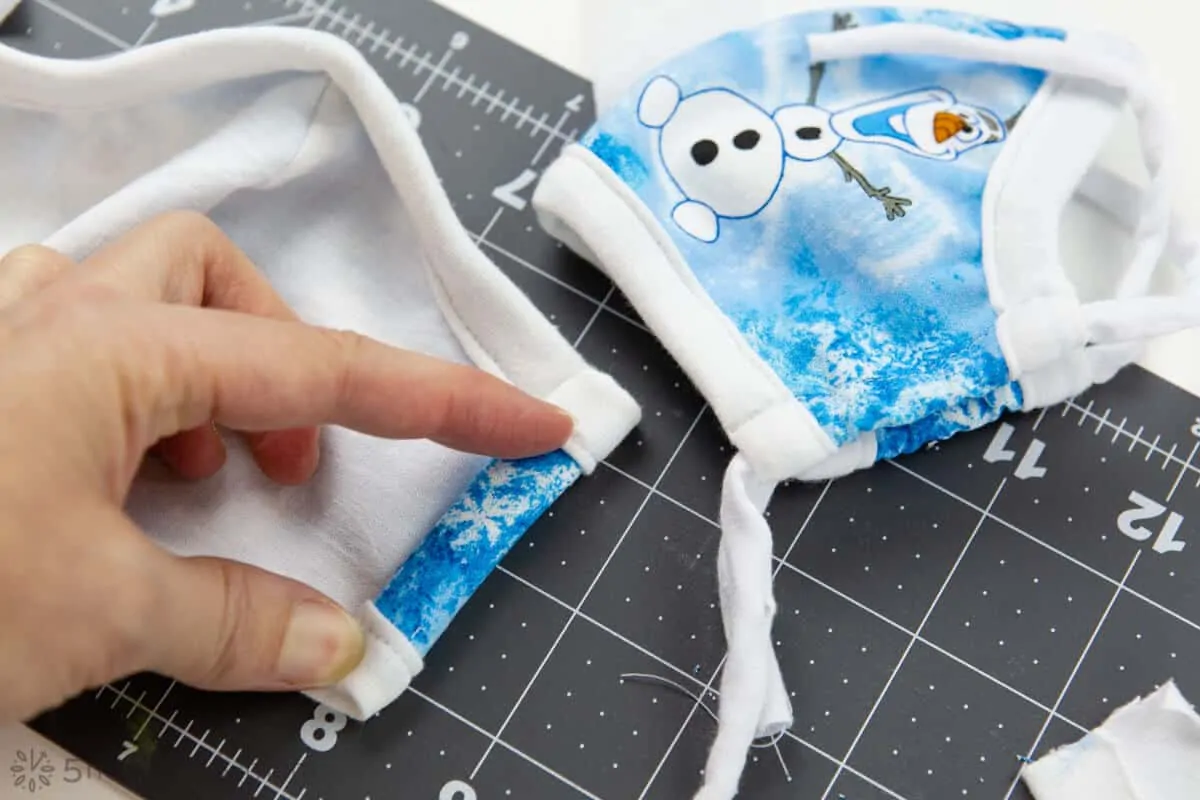
Or you can use rectangles of knit fabric to make casings that are covered in knit binding.
To make this binding casing version, first, trim off excess fabric (about 3/4″) from the sides that would otherwise have been used to fold over to form the channel. If you skip this step, your mask will extend closer to the ears.
Pin the two 1½”x4½” rectangles to the inside/lining side of the mask, with raw edges of knit 1/8″ away from raw edges of the sides of mask.

Stitch in place, 3/8″ from the raw edge.
Fold in short ends of binding. Then fold the long raw edge of the binding to the raw edge of mask and then fold over again to encase the raw edges in binding. Pin in place.
Topstitch binding in place, about 1/16″ to 1/8″ from the folded edge.
Repeat on the other side.
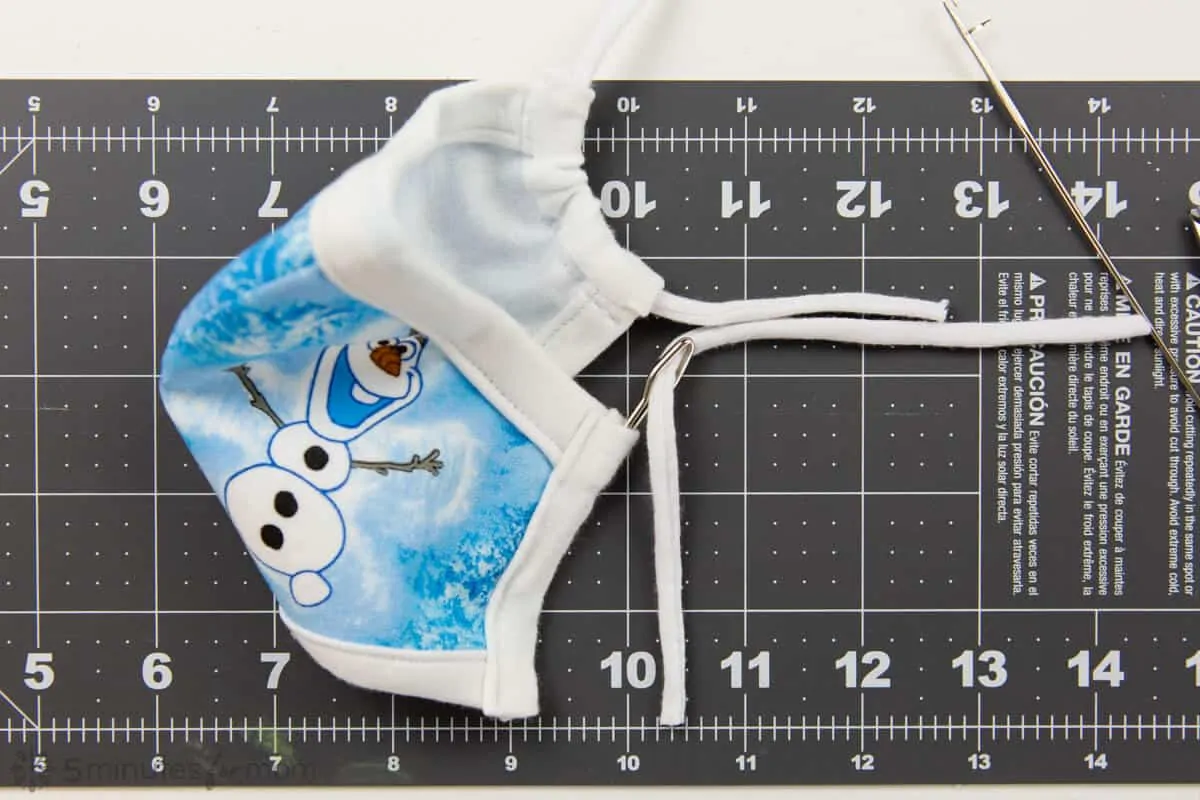
7. Thread Ties or Elastic Throw Casings/Channels
Use a bodkin, safety pin, or a bobby pin to thread your elastic or knit ties through the side casings/channels of your mask. (A bodkin needle is a fabulous tool that allows you to easily thread elastic, straps, etc. through channels, waistbands, etc. Bodkins can come in various lengths and styles.)
As we mentioned earlier in this post, to have the best and most comfortable fit for your mask, we recommend using stretchy knit ties. (Read our post to learn how to easily make your own knit ties with t-shirts or leggings you have at home, How to Make Ties for Face Masks using Knit Fabric.)
While most people prefer to have their masks knit ties or elastics loop around their ears, (it is faster to get your mask on and off if using ear loops,) using ties that go around the top of the head and the back of the neck allow you to tie your mask on firmly without tugging or hurting the ears.
You can use two sets of knit ties or, as we do, use one 25″-28″ long knit strap that loops around the top of the head and ties at the base of the neck.
Otherwise, you can use an “ear saver” that stretches across the back of the head and attaches to the ear loops to relieve the ears from the pressure of elastics pulling on ears.
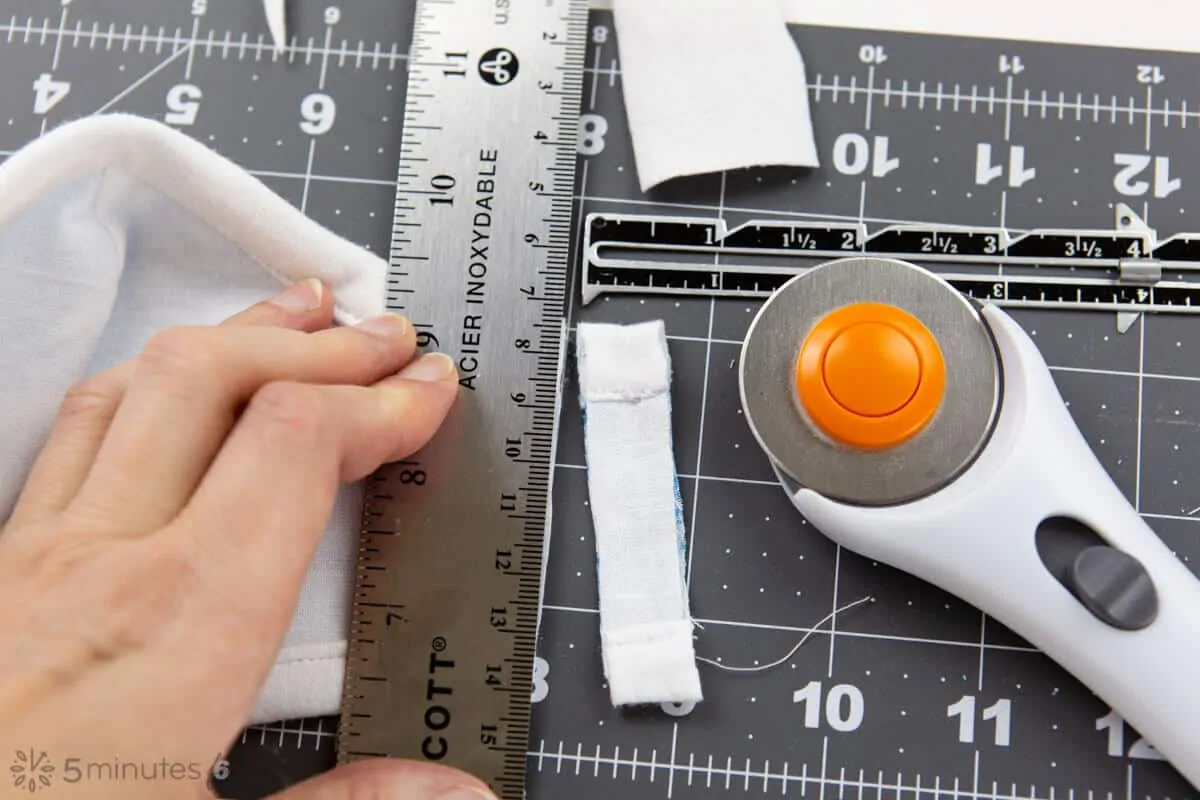
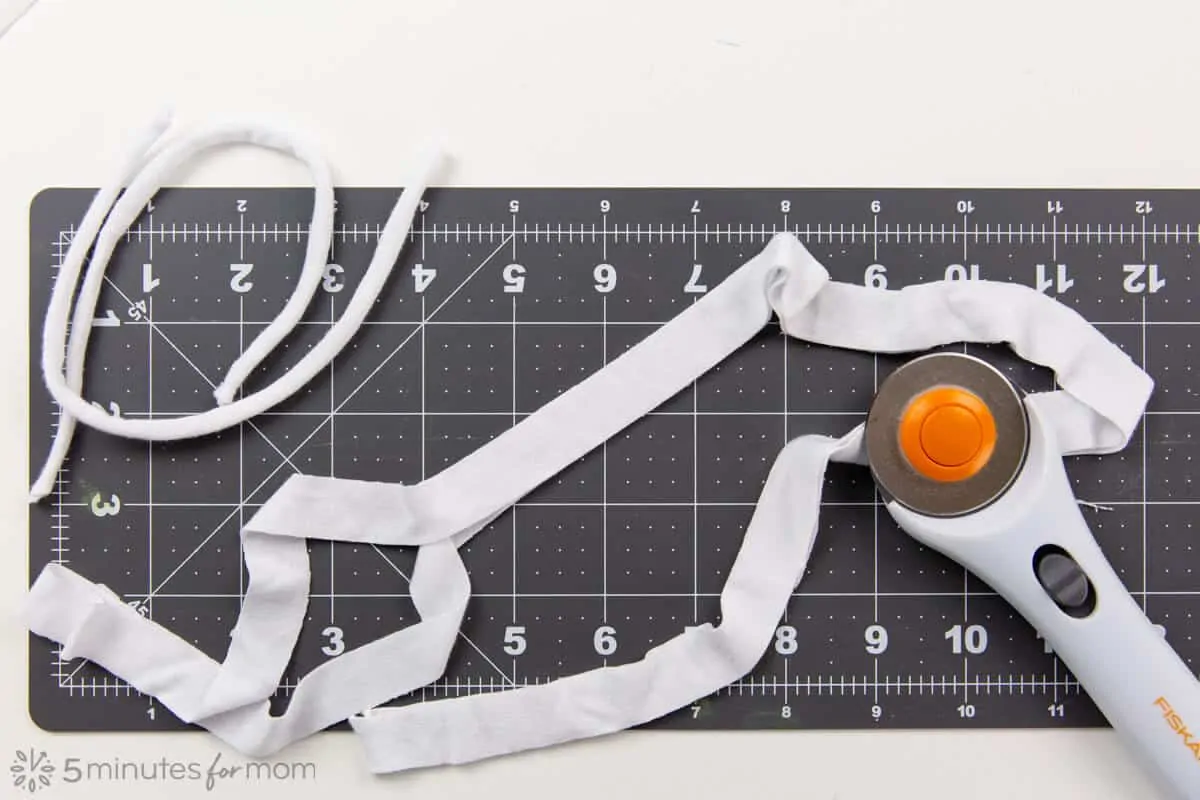
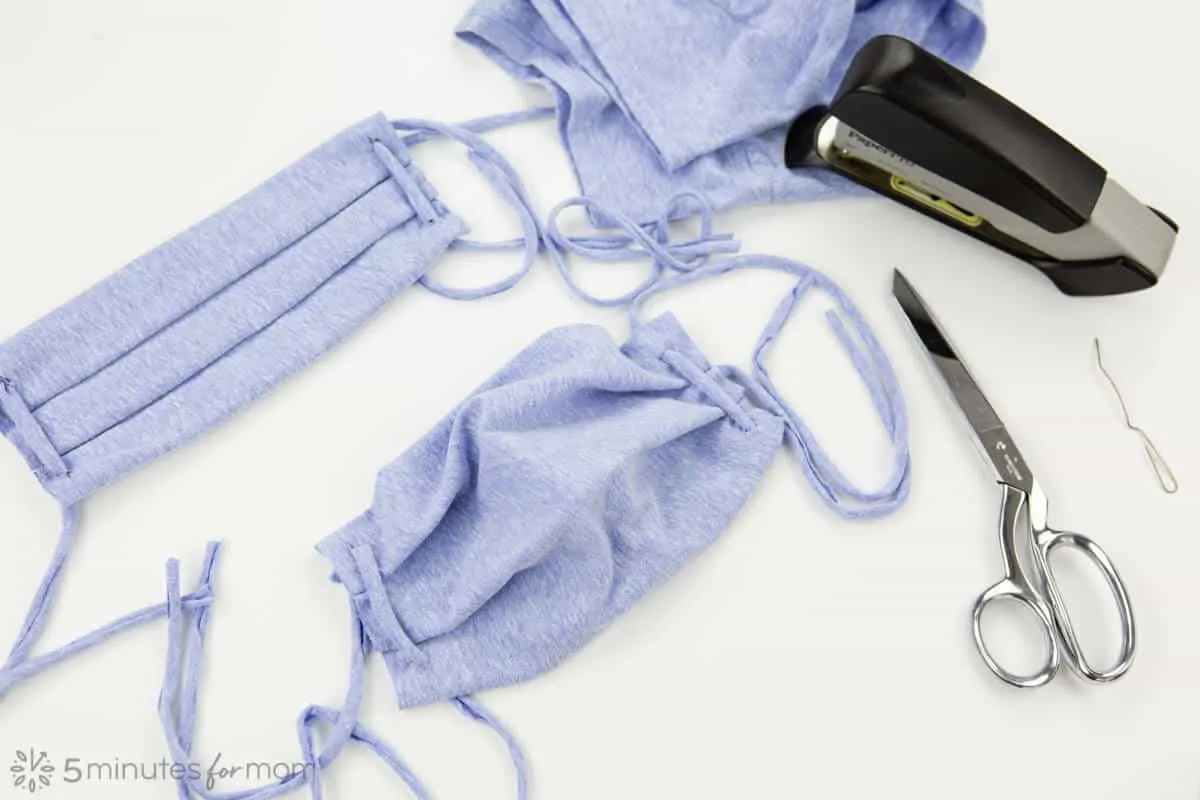
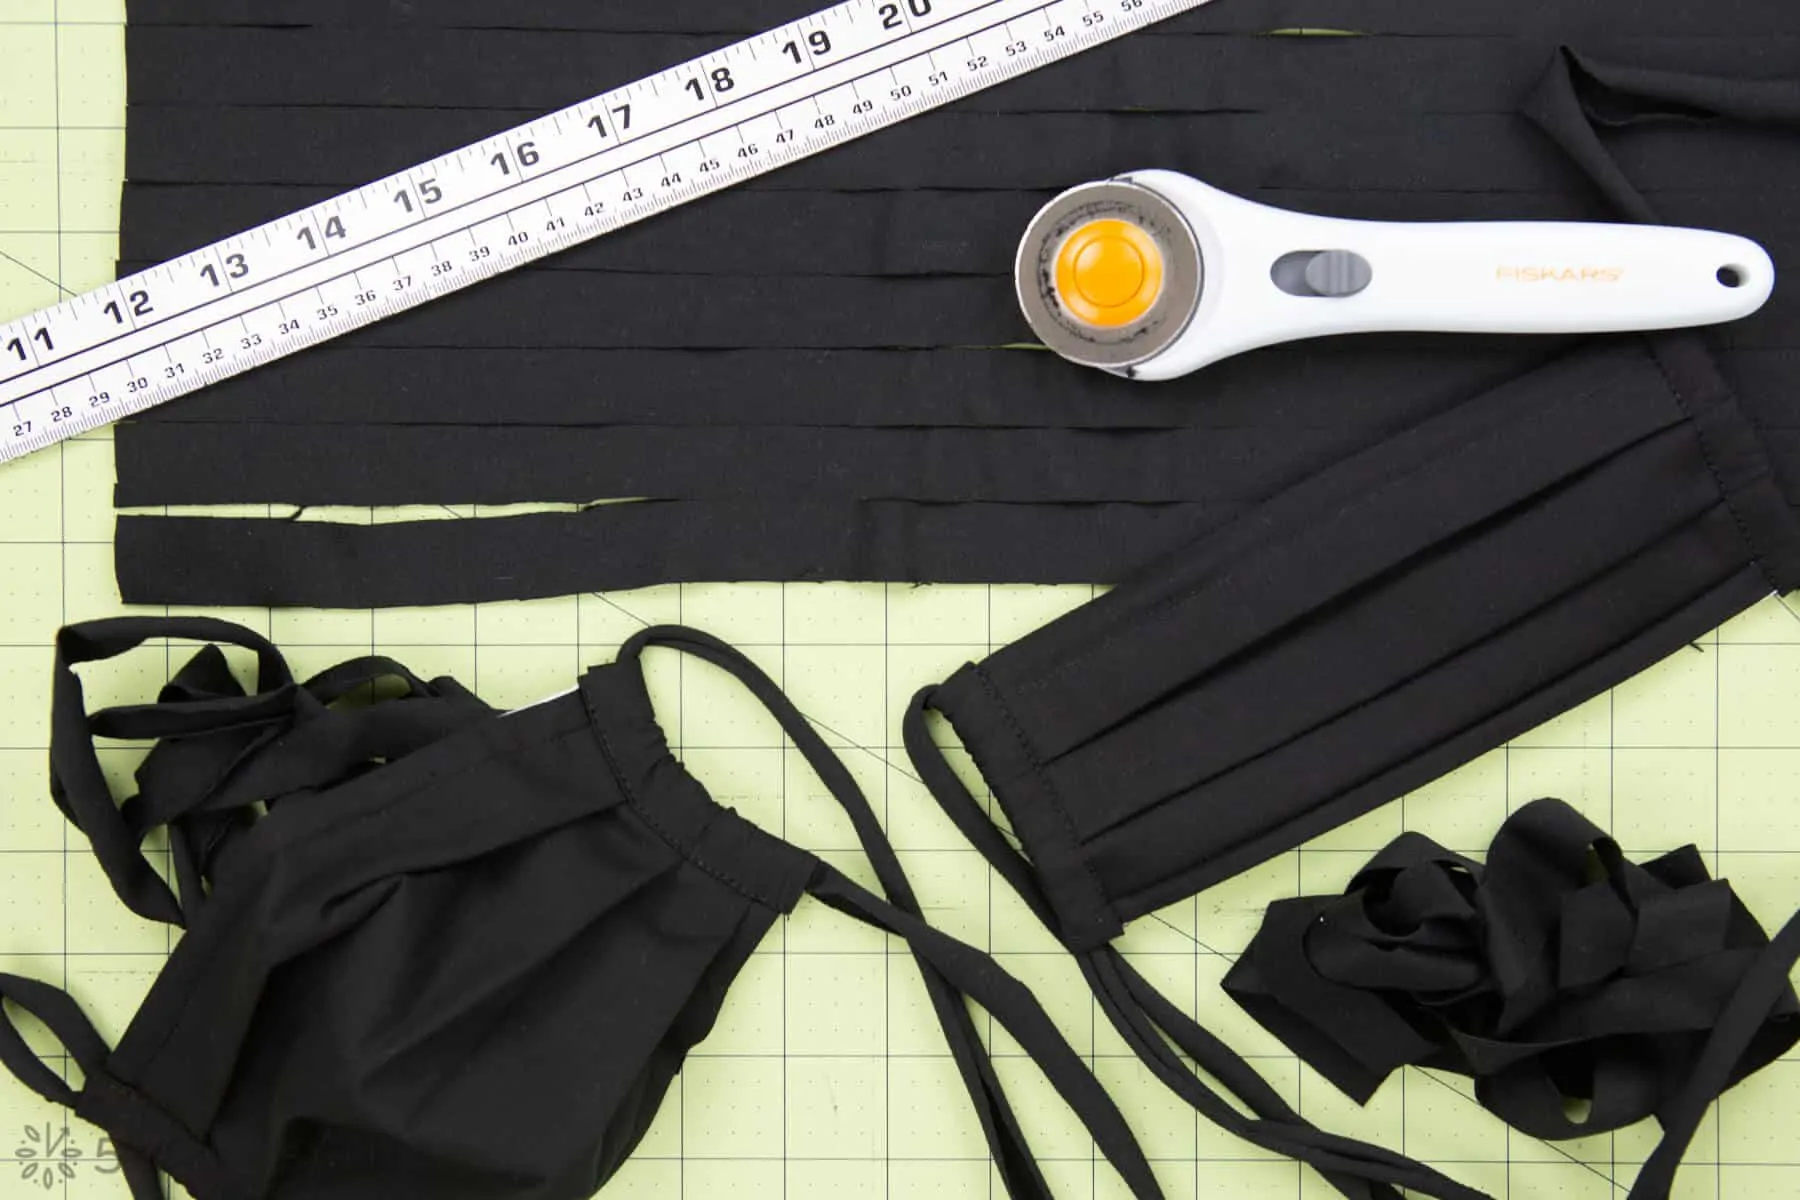
To make stretchy knit ties, simply cut long strips of light or medium weight knit fabric 3/4″ wide. Then STRETCH the strips so that the fabric ravels at the sides, forming “t-shirt yarn.”
If your knit fabric is too lightweight, it will disintegrate and drop tiny balls of fabric. But NO WORRIES!
Lightweight knit fabric makes perfect stretchy “spaghetti straps” that are perfect for face mask ties.
Cut long 3/4″ wide strips of lightweight knit fabric.
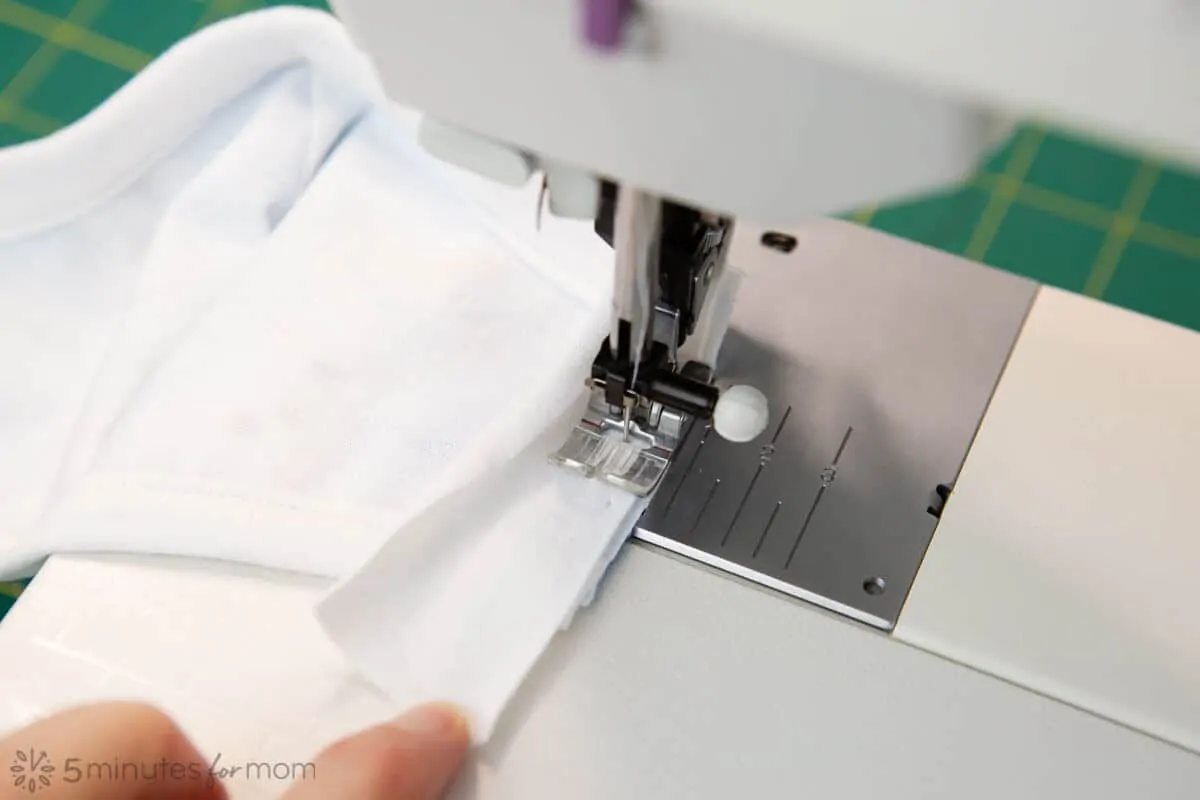
Fold in half, lengthwise, with right sides together, and stitch along the raw edge with a small zig-zag stitch.
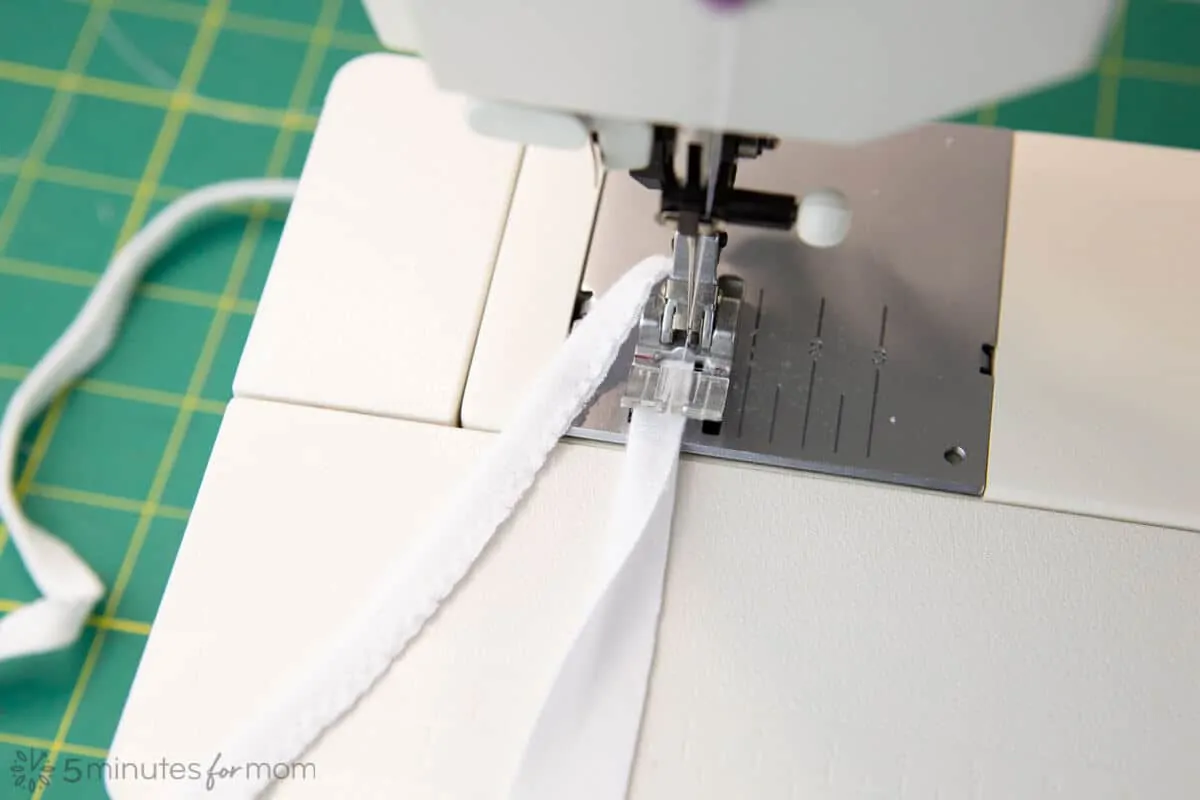
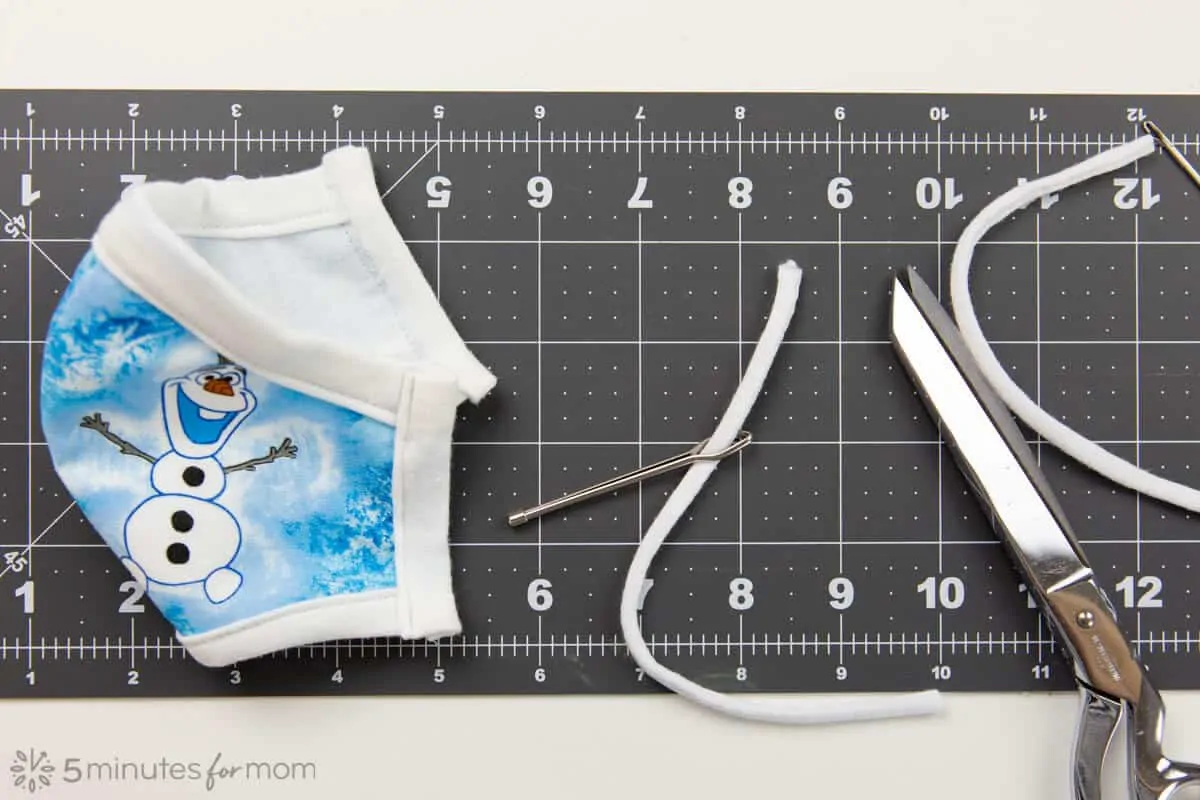
Then turn the long tubes of fabric with a loop turner or a bobby pin. (A loop turner is a long, wire tool used to turn fabric tubes, such as bias tubes and spaghetti straps, right side out.)

Trim to size – we recommend 8″-10″ long knit strips if using as ear loops and about 25″-30″ long knit strips is using as one piece that loops at the top of the head and ties at the back of the neck.
Then thread ties through casings with a bodkin, safety pin, or bobby pin.
If you are using your knit ties around the ears, you can tie them with knots so that they are adjustable. Once you know the correct size and fit for your masks, you can sew the ear loops if you prefer.
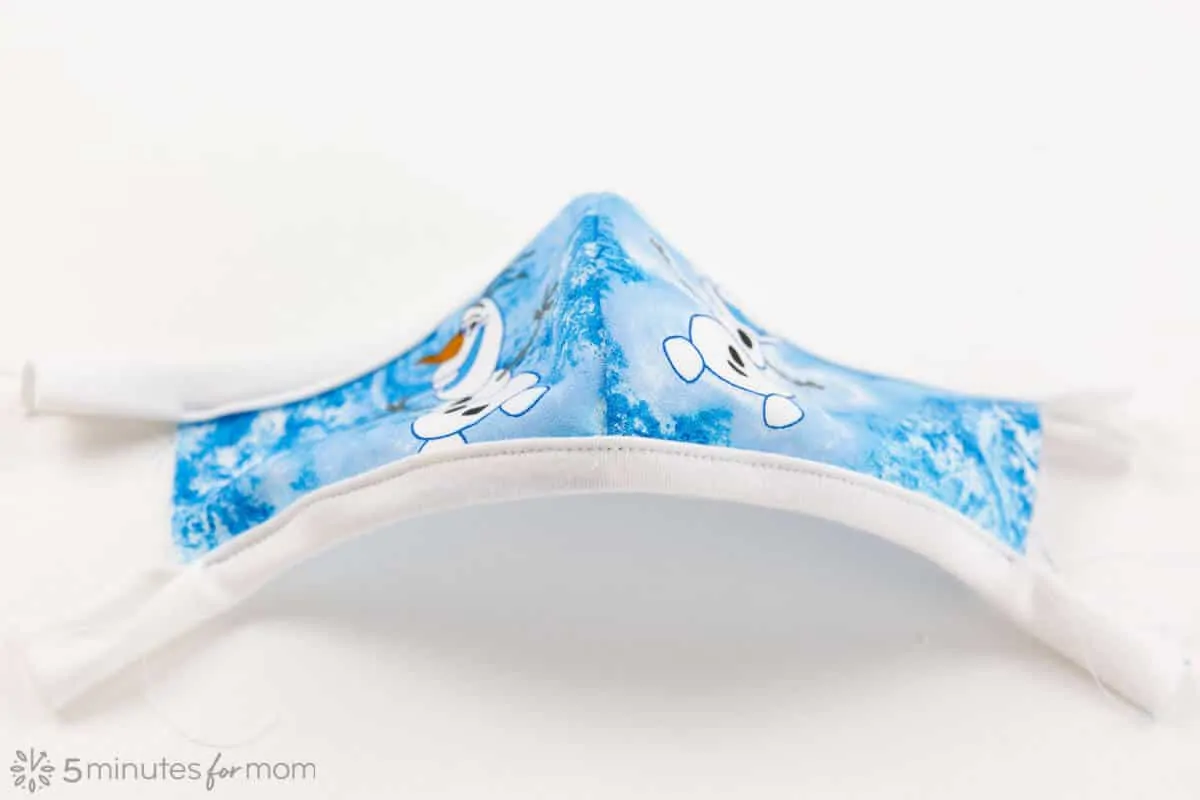
Congratulations — you have just made your super comfortable fitted face mask!
For a pleated face mask, check out our DIY cloth face mask pattern which also includes sizes for adults and children.
For a pleated face mask with a filter pocket, check out our Pleated Face Mask with Filter Pocket Pattern and Tutorial, which also includes adult and child sizes.

For a no-sew option, you only need a stapler and a t-shirt to make this No-Sew Face Mask with Pocket for Removable Filter.
Also see how to make fabric ties for face masks from old t-shirts or leggings. These face mask straps are the most comfortable and super easy to make.
Tweet or pin this post to share with your friends and save it for later.
Please note: This tutorial is for a non-medical face covering and is not intended to prevent disease or protect the wearer from disease. Please use this tutorial and face mask at your own discretion.
Written by Janice Croze, co-founder of 5 Minutes for Mom
Talk with me: @5minutesformom and Facebook.com/5minutesformom
Pin with me at pinterest.com/5minutesformom