- Intel Core2 Duo or later on any of the following Apple hardware:
- Mac Pro
- MacBook Pro
- MacBook
- MacBook Air
- iMac
- Mac Mini
- 2 GB
- 300 MB
Configuring Phone Services
Jabber Softphone
Jabber for Mac provides a option to supply phone services through a Cisco Unified Client Services Framework devices which is often referred to as a CSF or Softphone.
To configure a CSF device, log in to the CUCM Administration web page and navigate to Device > Phone.
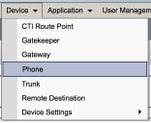
From the Find and List Phones menu select Add New.

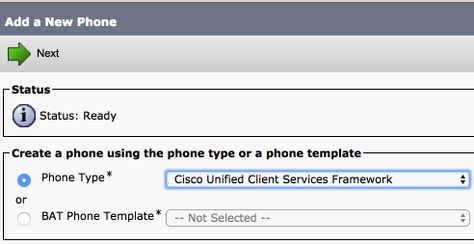
Once on the Add a New Phone menu search the phone type drop down for the Cisco Unified Client Services Framework device type. Once selected click Next.
The table below (Table 1.0) contains all the fields that must be configured when setting up a Cisco Unified Client Services Framework (CSF) device in CUCM. Majority of required fields have default configurations and don't need to manually configured unless otherwise required for your deployment. You must manually configure all the fields where the Configured by Default column in the table below is set to NO.
Tip: Cisco recommends that all Client Services Framework devices be configured with a device name prefix of CSF. For example, you provision a user named Holly Day with a CSF device. Her CUCM end user user ID Is hday so her CSF device name would be CSFHDAY.
Table 1.0
Choose a Presence group for the end user. The selected group specifies the devices, end users, and application users that can monitor this directory number.
The default value for Presence Group specifies Standard Presence group, configured with installation.
Once you have configured all the required field for the CSF configuration save the configuration by selecting the Save button.

Now that you have created a CSF you will need to add a directory number to the device. This can be done by select the Add a new DN option located at the top left of the CSF configuration.

Note: This document does not cover the complete line configuration for the CSF device. Line configuration is a standard configuration that must be performed for all phones and is not a configuration that is specific to CSF devices.
Tip: Once you have configuring a directory number your CSF device make sure to associate the CUCM end user to the directory number. This can be done by scrolling to the bottom of the directory number configuration and selecting Associate End Users. This configuration is required if you plan to use Jabber for phone presence.
Jabber Deskphone
Jabber for Mac also has the capability to perform Cisco Computer Telephony Integration (CTI) with Cisco deskphones. This allows Jabber for Mac users to use their Cisco deskphone as their Jabber telephony device when perform call actions from the Jabber user interface.
Deskphone Configuration
To setup Jabber for Mac CTI integration follow these simple steps.
Start by logging into the CUCM Administration web page and navigate to Device > Phone.
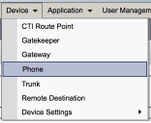
From the Find and List Phones menu search for and select the Jabber users deskphone.

When presented with the Phone Configuration menu verify the two setting listed below:
- Verify that the Allow Control of Device from CTI check box is checked.
- Confirm the device Owner User ID is set to the Jabber for Mac user CUCM user ID.
CTI UC Services Setup
Next we will setup the CTI UC services that will be used by the Jabber client to connect to the CUCM CTIManager service. Start by navigating to User Management > User Settings > UC Service.
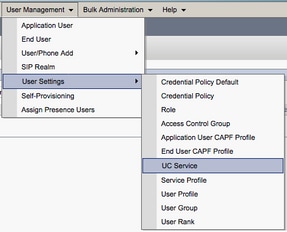
Once on the Find and List UC Services page select Add New.

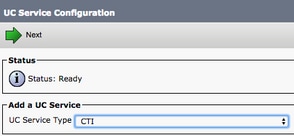
When presented with the UC Service Configuration page select CTI from the UC Service Type drop down then select Next.
You will then be presented with the UC Service Configuration page. Here must configure a Name for the CTI UC Service as well as provided the IP, Hostname or Fully Qualified Domain Name (FQDN) of the CUCM server that is running the CTI service.
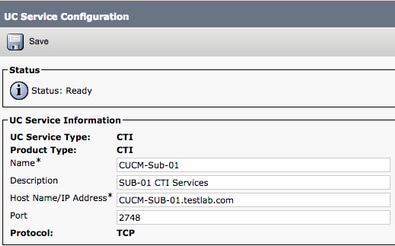
Note: Up to three CTI UC Services can be assigned to a UC Service Profile.
Now that we defined the CTI UC Service(s) we will assign them to the Service Profile. Start by navigating to User Management > User Settings > Service Profile.
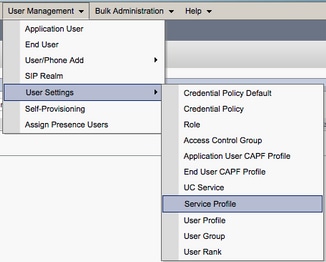
From the Find and LIst Service Profiles menu search for and select the service profile used by your Jabber for Mac users or create a new service profile by selecting Add New.


Once on the Service Profile Configuration page scroll down to the CTI Profile section and assign the CTI UC Services to the service profile then select Save.

Note: This document does not cover the configuration of a new new Cisco deskphone as this is a basic CUCM administration task.
To view the list of ( CTI) supported devices, navigate to CUCM Cisco Unified Reporting and select the Unified CM Phone Feature List Report . Next select CTI controlled from the Feature drop-down list.
Configuring Voicemail
Jabber for Mac is able to retrieve and playback voicemail messages that have been stored on Cisco Unity Connection. To setup voicemail for Jabber for Mac please follow the steps below:
Unity Connection Configuration
Start by logging into Cisco Unity Connection web administration web page and navigating to Users > Users.

When presented with Search Users page search for and select your Jabber for Mac users mailbox.
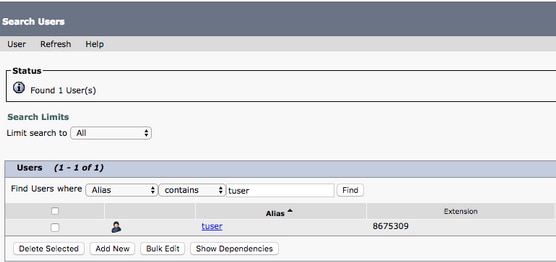
Once presented with the Edit User Basics page of the user Mailbox notate the Calls of Service that is configured.

Via the left hand navigation pane navigate to Class of Service > Class of Service.

When presented with the Search Class of Service page search for and select the class of service you previously notated.
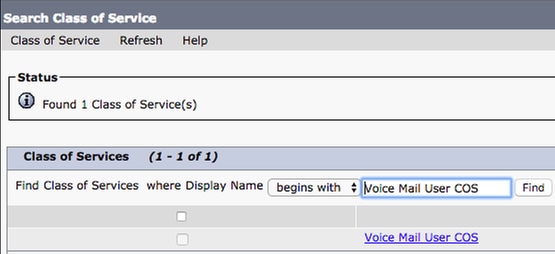
Once on the Edit Class of Service page verify that the following:
- Verify that the check box is checked for the Allow Users to Use the Web Inbox and RSS Feeds feature.
- Also verify that the Allow Users to Use Unified Client to Access Voicemail feature is enabled by checking the box near the feature name.
Once the Class of Service configuration has been verified navigate to System Settings > Advanced > API Settings in the left navigation pane. Enable all three of the settings presented on the API Configuration page.

CUCM Configuration
Now that Unity Connection is setup we will move on to the CUCM configuration for Jabber for Mac voicemail. Start by navigating to User Management > User Settings > UC Service.
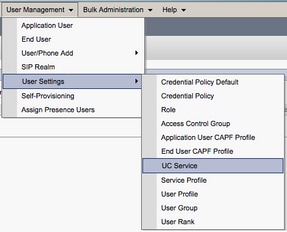
Once on the Find and List UC Services page select Add New.

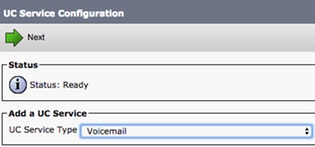
When presented with the UC Service Configuration page select Voicemail from the UC Service Type drop down then select Next.
You will then be presented with the UC Service Configuration page. Start by selecting Unity Connection from the Product Type dropdown. You will also need to configure a Name for the Voicemail UCService as well as provided theIP, Hostname or Fully Qualified Domain Name (FQDN) of the Unity Connection server that is running the REST and Jetty services.
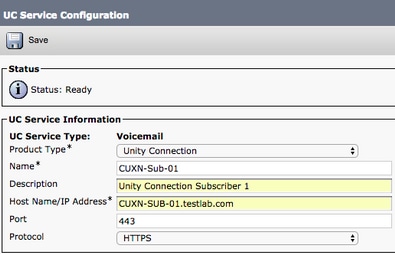
Note: Up to three Voicemail UCServices can be assigned to aUCService Profile.
Now that the Voicemail UC Service(s) are defined we will assign them to the Service Profile. Start by navigating to User Management > User Settings > Service Profile.
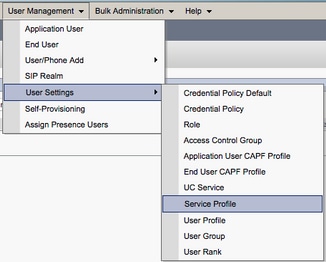
From the Find and LIst Service Profiles menu search for and select the service profile used by your Jabber for Mac users or create a new service profile by selecting Add New.


Once on the Service Profile Configuration page scroll down to the Voicemail Profile section and assign the Voicemail UCService(s) to the service profile then select Save.

Note: The Jabber for Mac setup above assumes that Unity Connection is using LDAP authentication. In cases where mailboxes are not LDAP integrated please refer to the Cisco On-Premises Deployment Guide.
Configuring Directory
Jabber for Mac is dependent on directory services for resolution of corporate contacts. Jabber is able to perform directory resolution through Lightweight Directory Access Protocol (LDAP) or CUCM User Data Services (UDS). Please refer to the sections below for information on configuration of LDAP or UDS directory services for Jabber for Mac.
LDAP Directory Services
Jabber for Mac supports three well known LDAP directory services, as seen below:
- Active Directory Domain Services
- OpenLDAP
- Active Directory Lightweight Directory Service (AD LDS)
This guide will provide the steps to configure Jabber for Mac 11.8 or above to integrate with Active Directory Domain Services, as this is the most common integration.
Start by logging into the CUCM Administration web page and navigating to User Management > User Settings > UC Service.
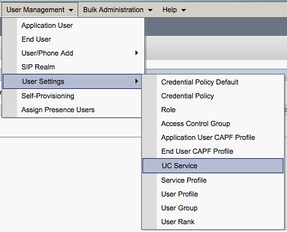
Once on the Find and List UC Services page select Add New.

When presented with the UC Service Configuration page select the Directory from the UC Service Type drop down and select Next.
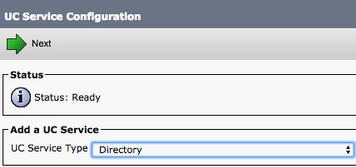
You will then be presented with the UC Service Configuration page. Select Enhanced Directory from the Product Type drop down. You will also need to configure a Name for the Directory UCService as well as provided theIP, Hostname or Fully Qualified Domain Name (FQDN) of the directory server.
By default the Connection Type will be set to Global Catalog which assumes that a Microsoft Domain Controller is being used as the the directory source. If a Global Catalog server is in use the Port number in the configuration should be set to 3268. Cisco does recommend the use of a Global Catalog server as a directory resource as it provides more efficient resolutions of queries.
Tip: In cases where you are not using a domain controller for Microsoft Active Directory Domain Services the Directory UC Service should have the Port set to 389 to Connection Type should be set to Ldap.

Note: Up to three Directory UCServices can be assigned to aUCService Profile.
Now that the Directory UC Service(s) are defined we will assign them to the Service Profile. Start by navigating to User Management > User Settings > Service Profile.
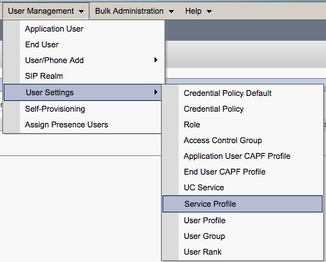
From the Find and LIst Service Profiles menu search for and select the service profile used by your Jabber for Mac users or create a new service profile by selecting Add New.


Once on the Service Profile Configuration page scroll down to the Directory Profile section and assign the Directory UCService(s) to the service profile. You will also need to define the Active Directory search base, this should be the organization unit or directory where your corporate users exist.
While configuring the Directory Profile section you will also have to configure a directory authentication method. Check the check box near the "Use Logged On User Credential" to prevent anonymous queries and force Jabber to authenticate with the credentials that were entered during Jabber log in. If the Use Logged On User Credential is left unchecked Jabber will attempt to perform a nonymous access to the directory server. Anonymous directory access is not recommended by Cisco.
Once you are done configuring the Directory Profile select Save.
Note: If you are using CUCM 10.X - 11.5.X the Directory Profile section of the Service Profile will also include username and password fields that allow for a dis tinguished name to be used as the user ID that is authorized to run queries on the LDAP server. In CUCM 12.X if you want to use a single user ID for authentication for directory services you will need to use the ConnectionUsername and ConnectionPassword parameters in the jabber-config.xml.
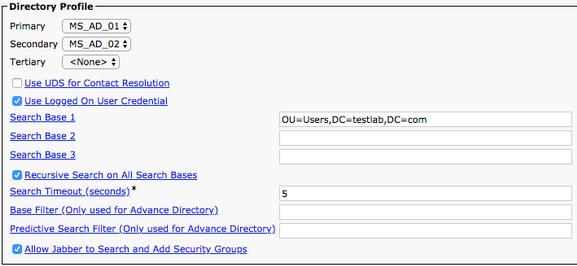
Caution: Cisco Jabber queries contact source using various attributes, not all of these attributes are indexed by default. To ensure efficient searches the attributes used by Cisco Jabber must be indexed on the directory server. For more information please refer to the LDAP Prerequisites section of the Jabber Planning Guide.
UDS Directory Services
CUCM User Data Services (UDS) provides a contact source API that can be used by Jabber over Cisco Expressway mobile and remote access for the contact resolution and it is an optional contact service for clients on the corporate network. The UDS contact source uses the Unified CM end user table information to provide a directory resolution.
Start by logging into the CUCM Administration web page and navigating to User Management > User Settings > Service Profile.
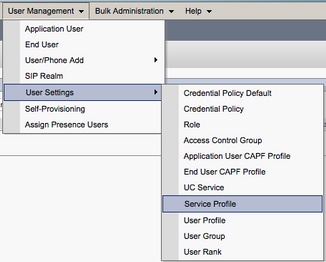
From the Find and LIst Service Profiles menu search for and select the service profile used by your Jabber for Mac users or create a new service profile by selecting Add New.

Once on the Service Profile Configuration page scroll down to the Directory Profile section and check the check box labeled Use UDS for Contact Resolution then select Save.
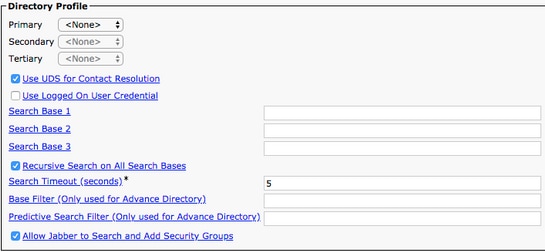
Once UDS Is enabled on the service profile Jabber for Mac will automatically discover the CUCM UDS servers during the Jabber log in process.
Configuring CUCM End Users
The CUCM end user configuration is a crucial step in deploying Jabber for Mac as many of Jabbers features are dependent on this configuration. The image below depicts all the Jabber configurations that are dependent on the CUCM end user configuration.
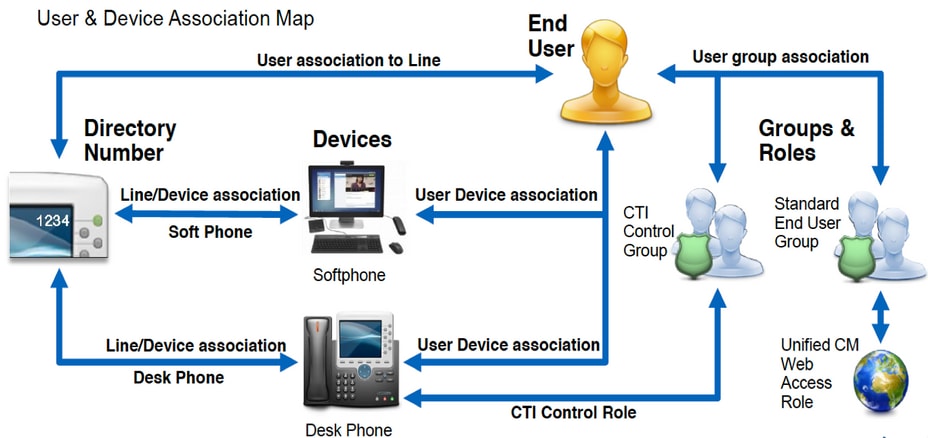
To configure the Jabber for Mac CUCM end user start by logging into the CUCM Administration web page and navigating to User Management > End User.
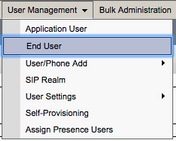
From the Find and LIst Users menu search for and select the CUCM end user you wish to configure for Jabber for Mac.

Once on the End User Configuration web page scroll down to the Service Settings section, here you can assign the end user the services you want them to use. To enable a user to be able to log in to Jabber for Mac you must enable the Home Cluster service by checking the check box next to the service name.
If your end users will be using Jabber for Mac for instant messaging you will need to enable their end user for the service by checking the check box next to the field labeled Enable User for Unified IM and Presence.
Next you will want to assign a service profile by selecting a service profile from the UC Service Profile drop down. The service profile is used to provide the Jabber client with CUCM UC service configuration. .
Note: If you don't assign a service profile to the CUCM end user then the user will automatically use the service profile that is set as the system default service profile.

Next scroll down to the Device Information section. Here you can manage the CUCM end users controlled devices. Assign the user their softphone and/or deskphone devices. CUCM provides this list of device to Jabber for Mac during Jabber log in.

You can assign a device to a user by selecting the Device Association button. You will then be presented with the User Device Association menu. From here you can search for the CUCM end users devices. When you find a device place a check mark in the check box next to the device and select Save Selected Changes.

Now scroll down to the Directory Number Association section and select the CUCM end users primary extension from the Primary Extension drop down.


Next scroll down to the Permissions Information section. Here will will assign the permissions that are needed by Jabber for Mac.
The table below (Table 1.1) lists all the required roles, their privileges and the reason why Jabber needs the role assigned.
Table 1.1
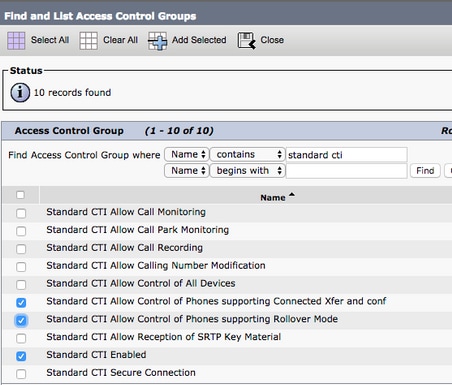
Roles Privileges/Resources Jabber Role Usage Standard CCM End Users Grant an end user log-in rights to the Cisco Unified CM User Options. Jabber SOAP Authentication Standard CCMUSER Administration Allows access to the Cisco Unified CM User Options. Jabber SOAP Authentication Standard CTI Allow Control of Phones Supporting Rollover Mode Allows control of all CTI devices that support rollover mode. Used for CTI Control of Cisco Unified IP Phone 6900 series Standard CTI Allow Control of Phones Supporting Connected Xfer and conf Allows control of all CTI devices that support connected transfer and conferencing Used for CTI Control of Cisco Unified IP Phone 9900, 8900, or 8800 series or DX series Standard CTI Enabled Enables CTI application control. Used for CTI control of all other Jabber compatible CTI devices. To assign a permission group to the CUCM end user select the Add to Access Control Group button.

Next, search for the access control group you would like to add and select the checkbox located near the access control groups name. When finished select the Add Selected button.
Service Discovery
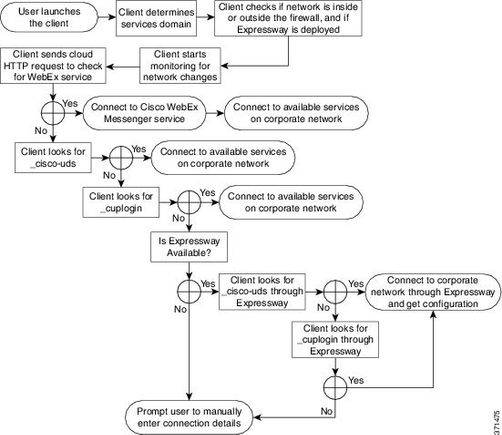
For the Cisco Jabber client to be able to log in it must first be aware of the services (CUCM, IM&P or Expressway) it will use for authentication and configuration retrieval. Cisco recommends configuring automatic service discovery through the use of Domain Name System (DNS) Service Location (SRV) records as this provides a seamless user experience and ease of administration.
The image below is graphical depiction of the Jabber automatic service discovery process.
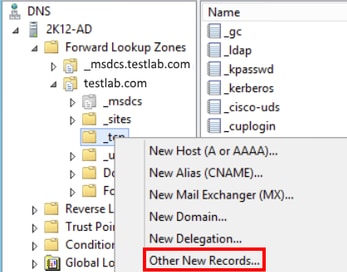
To add DNS SRV record to Microsoft DNS Manager navigate to your domain and expand the tree. Right click on the _tcp folder and select Other New Records.
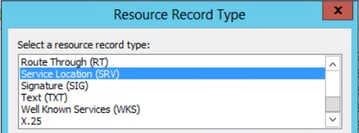
When presented with the Resource Record Type window, highlight the Service Location (SRV) then select Create Record.
Next you will be presented with the "New Resource Record" pane. Here you will configure a SRV record for each of the CUCM servers that will be used for Jabbers initial UDS home cluster lookup.
Below is a configuration example for the _cisco-uds SRV record. In this example the _cisco-uds record resolves to three CUCM nodes within a CUCM cluster.
_cisco-uds._tcp.testlab.com SRV service location: priority = 6 weight = 30 port = 8443 svr hostname = cucm3.testlab.com _cisco-uds._tcp.testlab.com SRV service location: priority = 2 weight = 20 port = 8443 svr hostname = cucm2.testlab.com _cisco-uds._tcp.testlab.com SRV service location: priority = 1 weight = 5 port = 8443 svr hostname = cucm1.testlab.com
Downloading Jabber
Start by opening your web browser of choice and navigating to https://software.cisco.com/download/home. Once on the download home page simply search for Jabber for Mac. When you are presented with download options select the Cisco Jabber for Mac Installation download as seen below:

Installing Jabber
Begin by identifying the Cisco Jabber for Mac installer that you previously download and select the CiscoJabberMac pkg file.

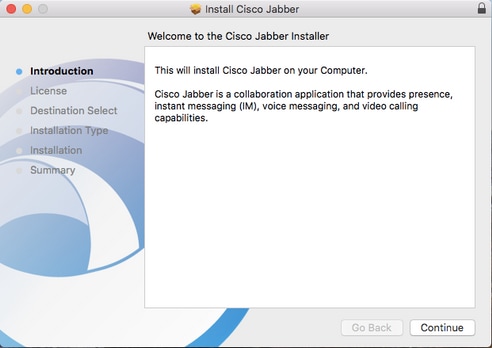
When presented with the Introduction screen select the Continue button to proceed with the installation.

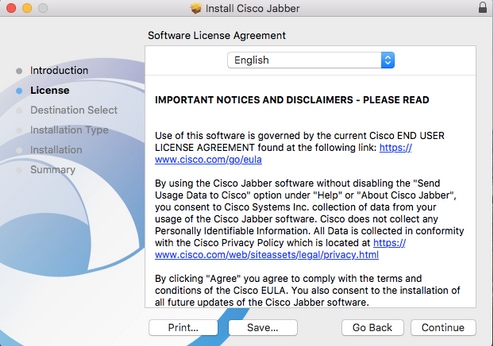
Next, read through the notices and disclaimers. If you wish to continue with the installation select Continue.
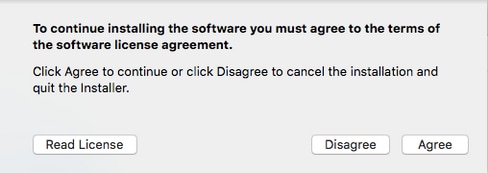
You will then be presented with a pop-up that asks you to confirm if you agree with the end user license agreement that was reviewed in the previous step. I If you wish to continue with the installation select Agree.
When presented with the Destination Select screen choose the disk you would like to install Jabber to, then select Continue.
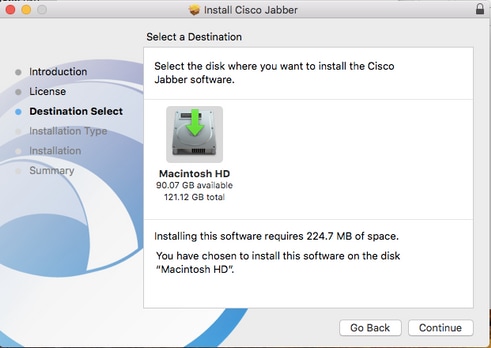
Next, choose the installation location or accept the default location by selecting Install.
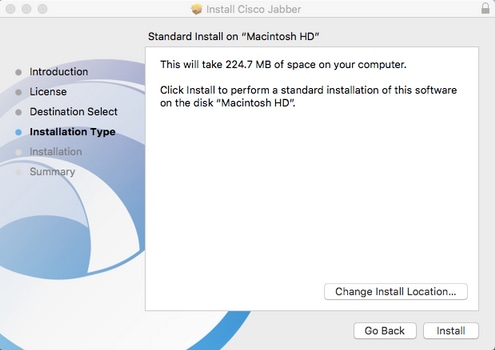
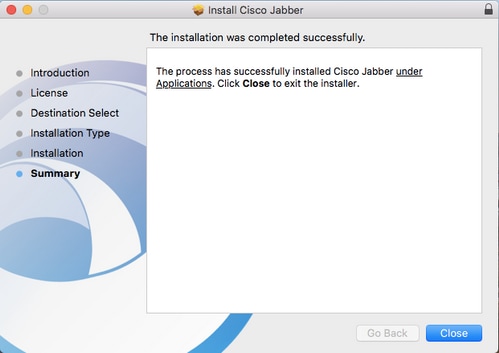
When the installation is complete you will be presented with the Summary screen. Select Close when finished with the installation wizard.
Logging in to Jabber
To perform a log in on Jabber for Mac, start by navigate to the Mac Launchpad and select Cisco Jabber from the list of available applications.

Once the Jabber application has launched provided the Jabber username and the domain that will be used for service discovery (example. tuser@testlab.com), then select Continue.
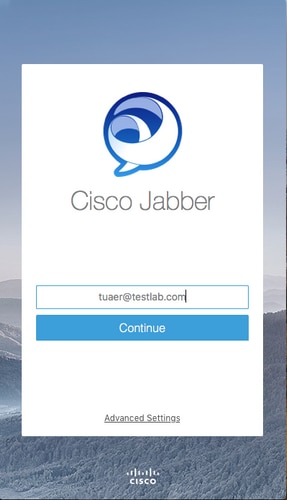
Once service discovery has finished you will be prompted to provide the credentials for Jabber log. Provide a valid Jabber username and password and select Sign In.